
Installing peel-and-stick floor tiles is an easy and cost-effective way to update your home without the need for professional help. This DIY project can transform your space in just a few simple steps.
In our guide, we’ll walk you through the entire process, from choosing the right tiles to the actual installation. Get ready to give your floors a fresh, new look with peel-and-stick floor tiles.
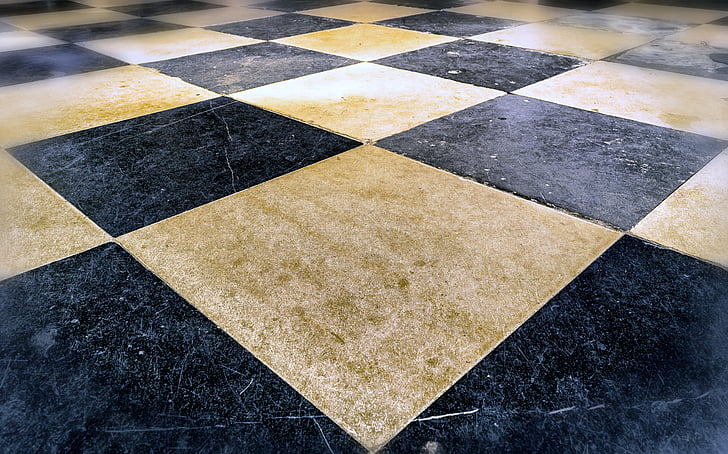
Choosing the Right Peel and Stick Floor Tiles
Understanding your space
The first step when selecting floor tiles is to assess the space you’re working with. It’s important to understand how much area you have and the layout of the room to determine what size and shape of tiles work best.
You’ll also need to consider any existing furniture in the area, as well as whether or not there are any uneven surfaces that may require additional leveling.
Material and design options
Once you’ve considered the space, it’s time to explore your material and design options. Peel-and-stick floor tiles come in a wide range of materials, colors, and textures. From wood-look vinyl planks to ceramic tile, there are tons of styles to choose from. Be sure to select tiles that match the existing décor of your home for a cohesive look.
Durability and maintenance
Before making your final selection, it’s essential to consider the durability and maintenance of your peel-and-stick floor tiles. The material you use will significantly impact how easy it is to clean and maintain.
Vinyl and ceramic tiles tend to be more durable than other materials, as well as easier to wipe down and keep free of dirt and grime.
Materials Required
Tools
Before you begin the installation process, it’s essential to have all of the necessary tools on hand. This list includes a tape measure, utility knife, level, and straight edge.
Depending on the material you’ve chosen for your peel-and-stick floor tiles, you may also need additional specialized tools such as a miter saw or tile cutter.
Adhesive
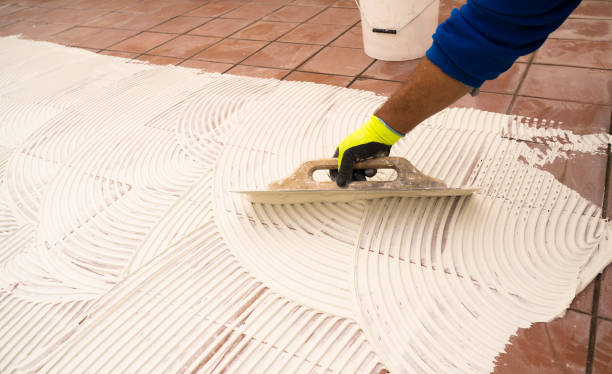
In addition to the tools, you’ll also need to purchase an adhesive specifically designed for peel-and-stick floor tiles. This is usually in the form of a pressure-sensitive adhesive or double-sided tape, which will help ensure that your tiles stay securely in place over time.
Be sure to read the manufacturer’s instructions before you begin applying the adhesive to avoid any mistakes.
Grout
If you’re using ceramic or stone peel-and-stick floor tiles, you’ll also need to buy grout to fill in the gaps between tiles. This will help create a stronger bond and give your finished floors a neat and professional look.
Most grouts come pre-mixed, but if you’re using a grout with special properties (such as stain-resistant or waterproof) you may need to mix it yourself according to the manufacturer’s instructions.
Cleaning Supplies
Finally, it’s important to have supplies for cleaning up any adhesive or grout that gets on your tiles during installation. You’ll need a bucket of warm water, mild detergent, and soft cloths or sponges.
Having these items on hand will make the installation process much easier and ensure that your finished floors look their best.
Now that you have all the supplies you need to install peel-and-stick floor tiles, you’re ready to begin! Just remember to take your time and double-check your measurements before you start. Good luck!
Preparing Your Floor for Installation
Cleaning the floor

Before you begin installation, you’ll need to make sure your floor is clean and free of any dirt or debris. Give the area a thorough cleaning with a vacuum and mop to remove any dust or dirt. This will help ensure the tiles stick properly and won’t be damaged by any underlying grime.
Leveling the floor
Once the floor is clean, you’ll need to make sure it’s even and level. Uneven surfaces can cause your tiles to bubble or lift over time. If there are any dips or peaks in the floor, use self-leveling concrete or a leveling compound to smooth it out before installation.
Measuring your space
You’ll also want to measure the space so you can order enough tiles. Make sure to calculate the area of your room before making your purchase. Peel-and-stick floor tiles are sold in packs, and you don’t want to find yourself short on materials when it’s time for installation.
The Installation Process
Laying out your pattern
After you’ve gathered your materials, it’s time to begin laying out the pattern. You can use a chalk line or ruler to create straight lines and a level to make sure everything is even. Once your lines are in place, it’s time to start peeling and sticking!
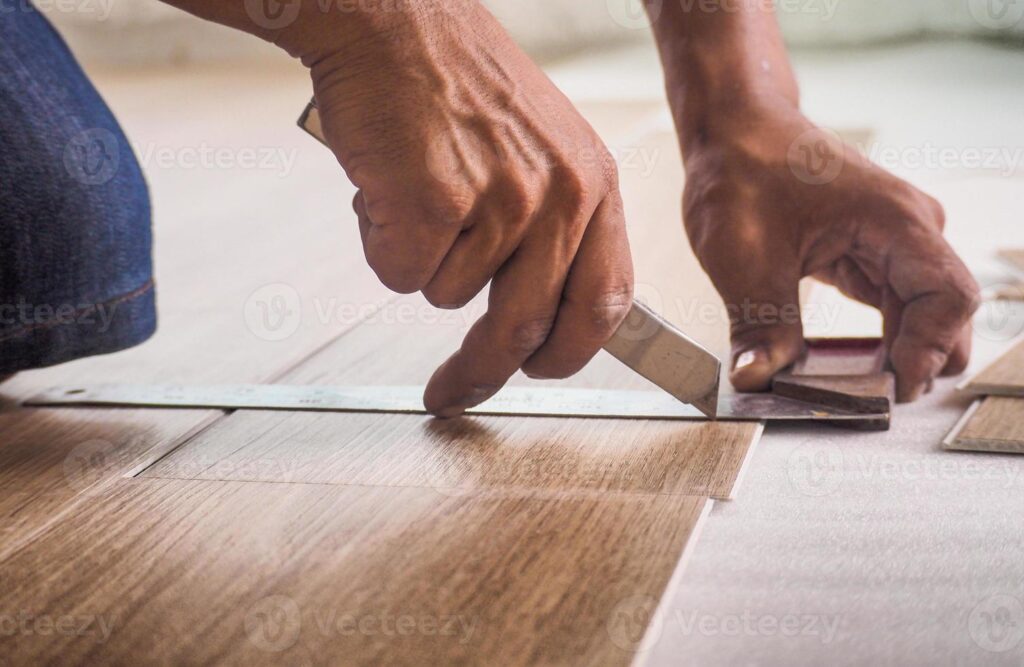
Cutting the tiles
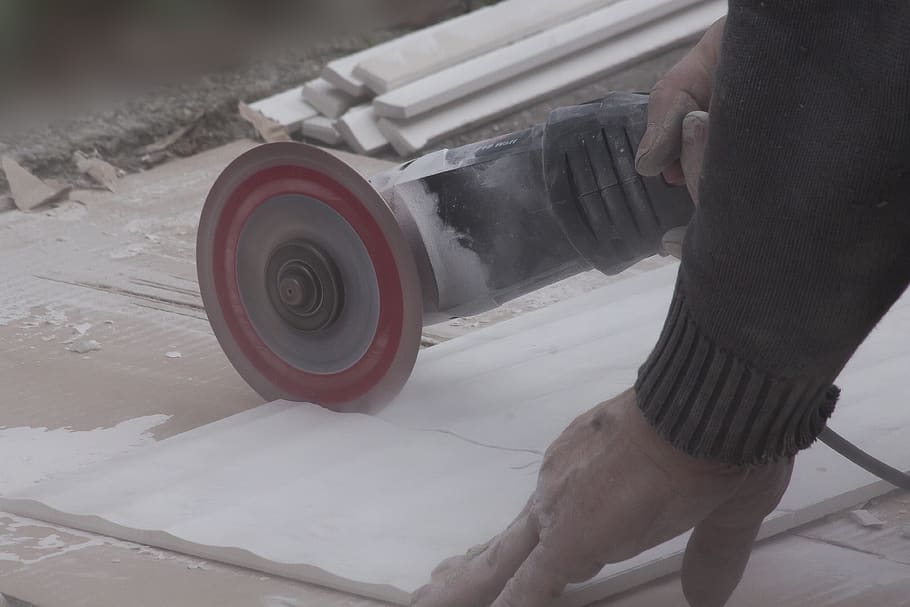
In some cases, you’ll need to cut the tiles to fit around corners or fixtures. Using a pair of scissors can work well for smaller cuts, but for larger sections, you may need a tile cutter. Make sure to measure twice and cut once, as any mistakes could require you to start over from scratch.
Sticking the tiles to the floor
Once you’re ready to start installing the tiles, peel off the backing and press them firmly into place. If needed, use a rubber roller or a rolling pin to ensure the tiles are pressed down snugly against the floor. Then, continue with the rest of your design until the entire area is covered.
Applying pressure
For the best results, it’s important to apply pressure to the tiles after installation. This will help ensure that they are firmly attached and won’t come loose over time. You can use a rubber roller or rolling pin for this step.
Post-installation Tips
Cleaning and maintenance
Once your installation is complete, it’s important to clean the tiles regularly. Use a mild soap and water solution or an appropriate floor cleaner to keep them looking their best. Additionally, avoid dragging furniture over the tile as this can cause damage.
Handling corners and edges
When it comes to corners and edges, you’ll need to take special care. For best results, use a sealant around the edges of the tiles to protect them from damage and dirt build-up. This will help ensure that your tile floor looks great for many years to come.
Related Topics:
Troubleshooting common issues
Uneven tiles
If you find that some of your tiles are not sitting evenly on the floor, this is likely due to an uneven surface underneath. To correct this issue, use a thin layer of adhesive or grout to level out the area before installing the tile.
Loose tiles
In some cases, the tiles may become loose over time. If this happens, simply remove the tile and reapply with extra pressure to ensure it stays in place. Additionally, use a sealant on the edges of the tile to help secure it firmly against the floor.
Curling or warping
If you notice that your tiles are curling or warping, this could be due to excess moisture. Make sure that the area is completely dry and ventilated before applying the tiles. You may also want to consider using a vapor barrier for added protection against moisture.
Advantages of Peel and Stick Floor Tiles
Peel and stick floor tiles are an easy and affordable way to add style and durability to any space. With their fast installation, you can transform any room in your home quickly and easily.
Additionally, they require very little maintenance after they are installed, making them a great choice for busy homeowners who don’t have the time or energy for complicated repairs and renovations.
Furthermore, these tiles are available in a variety of colors, patterns, and textures to help you customize your flooring to your exact specifications. Moreover, they are incredibly durable and can easily withstand heavy foot traffic, making them ideal for high-traffic areas.
Finally, peel-and-stick floor tiles come with a low price tag compared to other types of flooring, making them an economical option for any budget.
Conclusion
Peel and stick floor tiles are an easy and affordable way to update any room in your home. With their fast installation, low maintenance needs, and wide selection of colors and patterns, these tiles are a great choice for busy homeowners looking to quickly transform their space.
Be sure to follow the instructions carefully when laying down peel-and-stick floor tile to ensure a successful installation and a beautiful finished product. With a little preparation and patience, you can create a stunning floor that will be the envy of your neighbors.
FAQs
Are peel-and-stick floor tiles durable?
Yes, peel-and-stick tiles are incredibly durable and can easily withstand heavy foot traffic.
How long do peel-and-stick floor tiles last?
With proper installation and minimal maintenance, peel-and-stick floor tiles should last for many years.
Do I need to hire a professional to install peel-and-stick floor tiles?
No, you can easily lay these tiles yourself with minimal tools and experience. However, if you are not confident in your installation skills, it is best to hire a professional for the job.
I think this is a real great blog article.Much thanks again. Awesome.