
Maintaining the beauty and durability of your plank flooring is crucial. Over time, you might encounter a piece that’s scratched, damaged, or worn out. This guide will walk you through the simple, yet meticulous process of replacing a piece of plank flooring.
Focused on practical, step-by-step instructions, this tutorial will equip you with the essential knowledge and confidence to perform this task successfully, ensuring your floor maintains its aesthetic appeal for years to come.
While plank flooring is renowned for its durability and longevity, it’s not immune to the wear and tear of daily use.
Heavy foot traffic, accidental spills, or moving bulky furniture can result in scratches, stains, or even more significant damages.
Over time, these damages can detract from the beauty of your flooring and can even lead to issues such as moisture infiltration or uneven surfaces.
Therefore, it becomes necessary to replace affected planks to preserve the overall appearance and integrity of your floor. This process, although it requires some skill, can be accomplished with the right tools, a little patience, and by following our guide.
Adopting the correct technique for replacing plank flooring is of utmost importance.
Implementing proper steps not only ensures that the new plank fits seamlessly into the existing floor but also guarantees the longevity of the replacement.
Any deviation or shortcut in the process might lead to visible gaps, unstable flooring, or damage to surrounding planks.
These issues can compromise the overall aesthetic and functionality of your floor, and could potentially result in additional time and expense for further repairs.
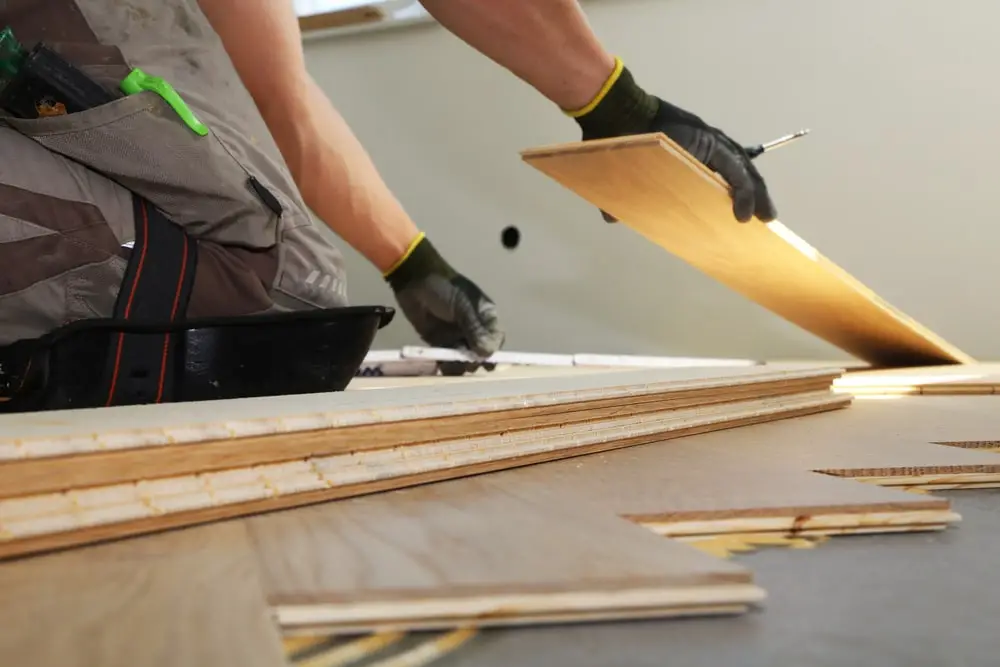
Tools and Materials
Before you begin the process of replacing a plank, ensure you have all the necessary tools and materials at hand. Here is a list of what you’ll need:
- Replacement Plank: Ensure you have a matching plank to replace the damaged one. It should be of the same material, color, and dimensions as the existing planks.
- Pry Bar: This tool comes in handy for carefully lifting the damaged plank without causing harm to the surrounding planks.
- Circular Saw or Oscillating Tool: These tools are used for cutting the damaged plank, making it easier to remove.
- Chisel: A chisel is useful for removing stubborn pieces of the plank that may not come off easily.
- Hammer: This tool is used in conjunction with the chisel to remove the plank pieces.
- Adhesive: An adhesive is essential for securing the new plank in place. Ensure that the adhesive is suitable for your type of flooring.
- Tape Measure: A tape measure is used to ensure the new plank fits perfectly into the space.
- Safety Equipment: Safety goggles and gloves are a must-have to protect against dust and sharp objects.
Identifying the Damaged Plank
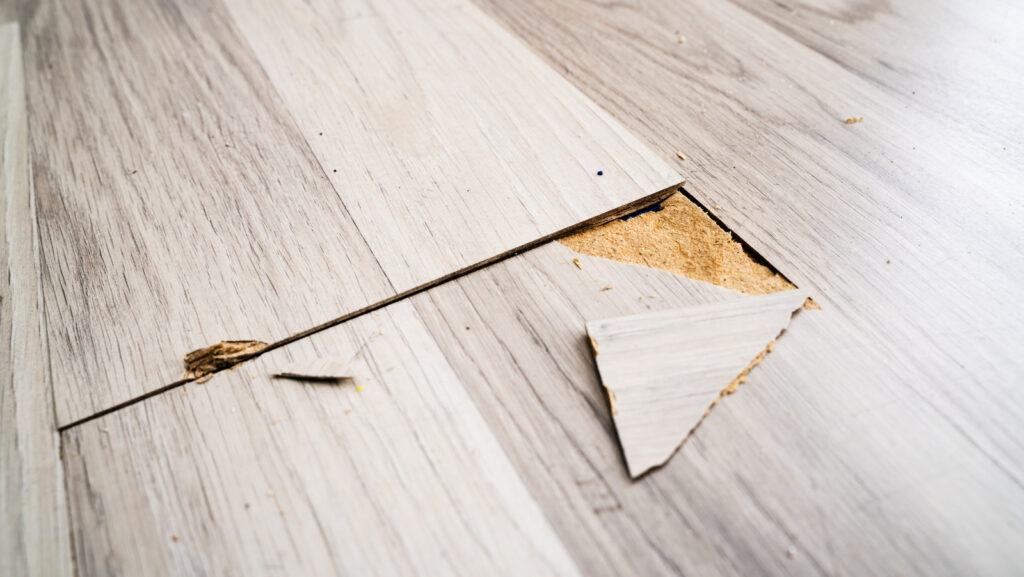
To replace a damaged plank, you first need to accurately identify the plank that needs to be replaced. Start by thoroughly inspecting your floor. This includes looking for any visible signs of damage such as stains, scratches, warping, or splits.
Pay keen attention to high-traffic areas, as these are the most likely places to harbor damaged planks.
Once you’ve identified a plank that appears to be damaged, verify by lightly pressing on different areas of the plank to check for unusual give or movement.
A plank that is structurally compromised will move more than the others when pressure is applied.
Additionally, listen for any sounds of crunching or cracking, as these are clear indicators that the plank is damaged beyond mere surface wear.
In cases where water damage is suspected, look for discoloration or a swollen texture on the plank. If the damage is not visible from the surface, check underneath the plank (if possible) to ensure the underlayment or subfloor is not compromised.
Remember, if more than one plank is damaged, mark them for replacement. Use a non-permanent method to mark, such as a piece of masking tape, to avoid further damaging the surface.
This process requires careful attention and patience. Rushing through it may lead to missing other damaged planks that also need replacement.
Removing the Damaged Plank
Step 1: Protect Adjacent Planks
Begin by placing a thin but sturdy sheet of plastic or plywood on the adjacent planks to protect them from any accidental damage during the removal process.
Step 2: Cut the Damaged Plank
You need a circular saw or an oscillating multi-tool to cut the plank. Set the depth of the cut to the thickness of the damaged plank to avoid damaging the subfloor.
Cut along the length of the plank, about half an inch away from its edges. Be careful to leave the tongue and groove of the adjacent planks intact.
Step 3: Remove the Center Piece
Once you’ve made the cuts, use a chisel and hammer to gently pry up the central piece. Exercise caution and control to ensure you don’t accidentally damage the adjacent planks or the subfloor underneath.
Step 4: Remove the Remaining Edges
With the central piece removed, use a chisel and hammer to carefully remove the remaining edges of the plank. Ensure you don’t damage the tongue and groove of the surrounding planks.
Step 5: Clean the Area
Finally, thoroughly clean the area where the damaged plank was removed. Be sure to remove all debris and dust to ensure a smooth and secure installation of the new plank.
Preparing the Replacement Plank
Step 6: Measure the Replacement Plank
Begin by measuring the length and width of the area where the damaged plank was removed. Use a tape measure for accuracy, and note down the dimensions. You should aim for a tight fit, so your measurements need to be precise.
Step 7: Mark the Cut on the New Plank
Place the new plank on a stable, flat surface. Using a straight edge and a pencil, mark the cutting lines on the new plank according to the measurements you took. Ensure that the pencil line is clear and straight.
Installing the New Plank
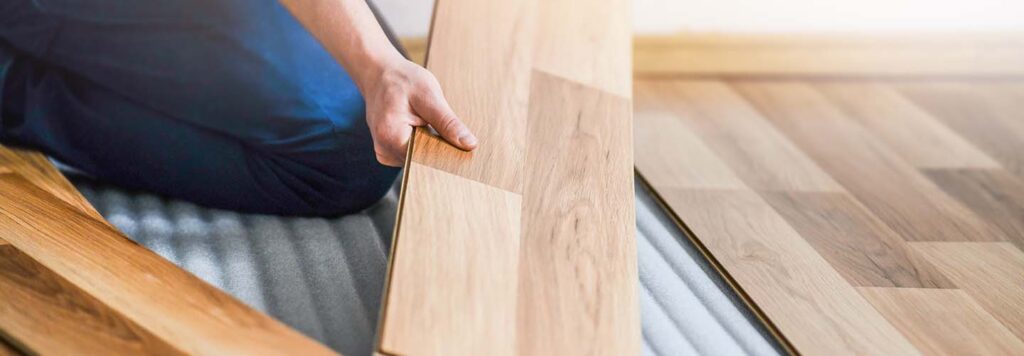
Step 8: Cut the New Plank
Using a circular saw or a jigsaw, carefully cut along the marked lines on the new plank. Always remember to wear protective gear to ensure safety. After cutting, check the fit of the new plank in the space to make sure it’s correct.
Step 9: Trim the Bottom of the Groove
You’ll need to fit the new plank into place without damaging the tongue of the adjacent planks. To do this, use a chisel to trim off the bottom of the groove on the new plank.
This allows the plank to fit over the tongue on the surrounding planks while still locking it into place.
Step 10: Apply Adhesive
Apply a thin layer of wood flooring adhesive to the bottom of the new plank and the subfloor where the plank will be installed. This will help secure the plank into place.
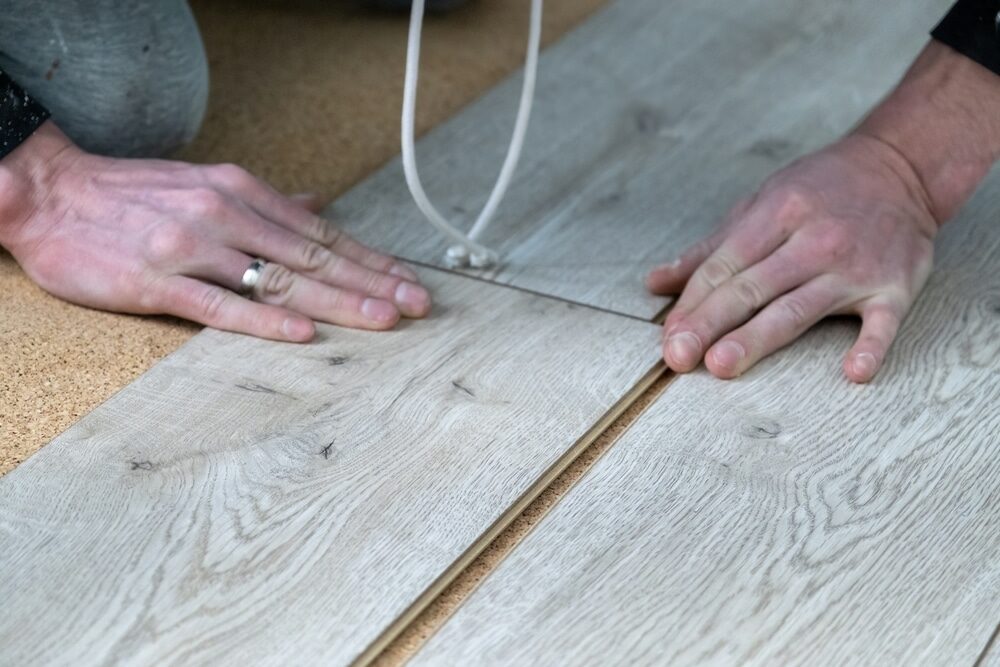
Step 11: Install the New Plank
Carefully slide the trimmed side of the new plank over the tongue on the adjacent plank, lowering it into place. Ensure the plank is perfectly aligned with the surrounding planks and fits snugly into the space.
Step 12: Secure the Plank
Once the new plank is in place, use a rubber mallet to gently tap it down, ensuring it’s level with the surrounding planks.
Wipe away any excess adhesive that squeezes out immediately to avoid staining the surface.
Step 13: Allow for Drying
Allow the adhesive to dry as per the manufacturer’s instructions. Avoid walking on the new plank until it’s fully set and secure.
Once dry, your replaced plank should blend seamlessly with the rest of the floor, creating a smooth and stable surface.
Related Topics:
Sealing and Finishing Up
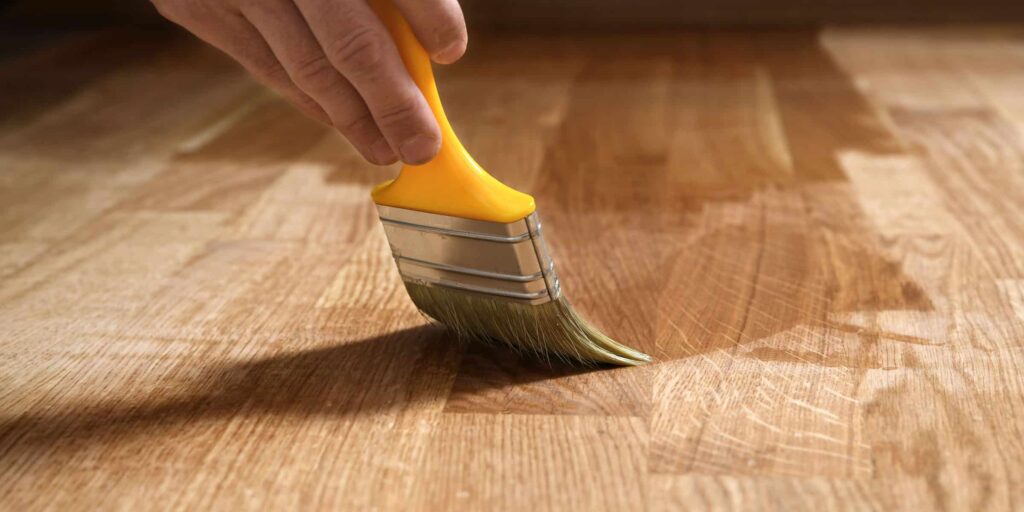
Step 14: Seal the New Plank
After the adhesive has fully dried, it’s time to seal the new plank to protect it and ensure it matches the rest of your flooring.
Before starting, clean the plank and surrounding area, ensuring there’s no dust or debris. Apply a thin layer of polyurethane sealer using a fine-bristle brush. Try to match the finish of the existing floor for the best results.
Apply the sealer evenly, ensuring all areas of the new plank are covered. Allow the sealer to dry for the time recommended by the manufacturer.
Step 15: Apply a Second Coat
If necessary, apply a second coat of sealer. This will provide additional protection and improve the appearance of the plank, helping it to blend in with the existing flooring.
Allow the second coat to dry fully before proceeding.
Step 16: Clean Up
Once the second coat of sealer is dry, you can begin the cleanup process. Collect all tools and materials used during the plank replacement. Discard any waste materials per local regulations.
Sweep or vacuum the floor to remove dust and debris from the work area. Use a moist cloth to clean any adhesive or sealer that may have splattered on adjacent planks.
Step 17: Polish the Floor
The final step in the process is to polish the floor. This will restore the shine and allow the new plank to blend seamlessly with the rest of your flooring.
Use a high-quality floor polish and a clean mop or cloth to polish the entire floor, focusing particularly on the newly replaced plank.
Once complete, your floor should look as good as new, with the replaced plank blending perfectly with the existing floor.
Conclusion
By following the detailed steps outlined in this guide, you’ve successfully learned how to replace a piece of plank flooring. This crucial skill ensures that the beauty and integrity of your floor are maintained, even in the face of wear and tear.
Remember, proper execution of each step fosters seamless integration of the new plank with the existing flooring, enhancing overall aesthetics and durability.
As with any home improvement project, patience, precision, and adherence to instructions are key to achieving satisfying results. With the knowledge acquired from this guide, you’re now well-equipped to tackle any plank flooring replacement task.
Keep this guide handy for any future needs and enjoy the enduring charm of your well-maintained plank floor. Keep learning and improving your DIY skills!
FAQs
What type of polish should I use for my plank flooring?
The choice of floor polish depends on the type of plank flooring. A high-quality polish designed specifically for your floor type (like hardwood or laminate) is typically recommended. Ensure that it’s safe for your floor, non-toxic, and provides a nice shine.
How can I prevent damaging other planks when replacing a piece of plank flooring?
To avoid damaging adjacent planks when replacing a piece of flooring, work carefully and methodically. Use the right tools and follow the instructions provided. Avoid excessive force, and ensure the work area is clean before starting the process.
How often should I polish my plank floor after replacing a piece?
The frequency of polishing depends on the traffic and wear your floor endures. However, a general guideline is to polish your floors every 2-4 months. Polishing not only enhances the shine but also offers an extra layer of protection for your floor.
1 thought on “How To Replace A Piece Of Plank Flooring Without Damaging”