
You should have a floor nailer whenever you plan to install a hardwood floor in your home. Because without a floor nailer, you can’t complete the process.
But yet it is not easier to use it without knowing how to use a floor nailer.
After all, it is a hardware tool that needs some basic instructions and steps before using it.
Now the question is why do you need a floor nailer?
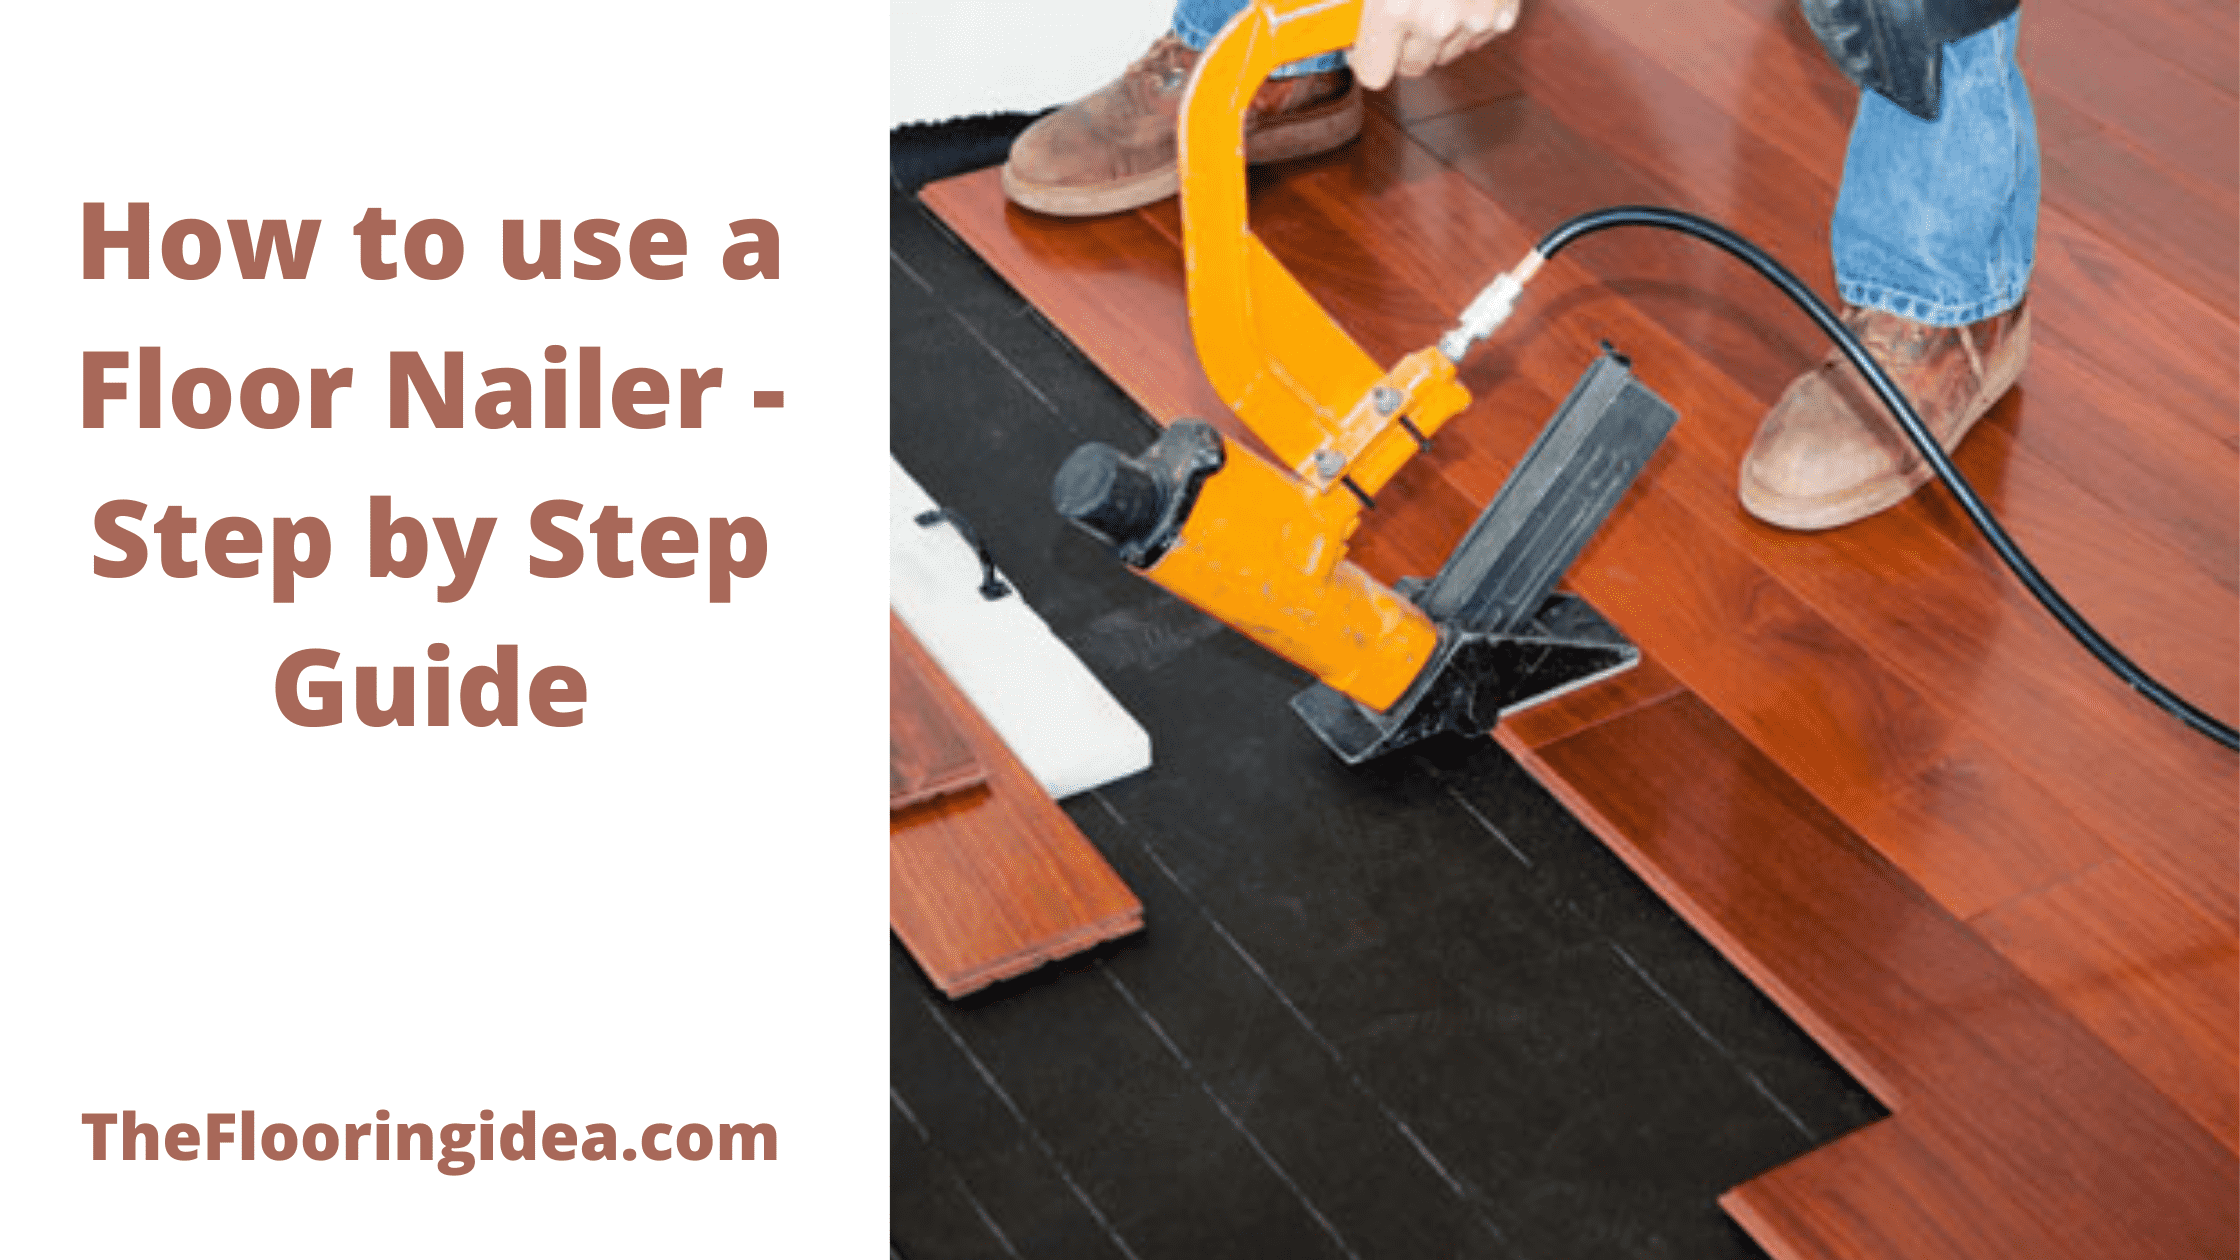
A flooring nailer is a nailing tool that allows you to insert the nails while installing the hardwood floor in your home or anywhere else. You can insert nails even at a 45-degree angle using it.
But it is still not enough to know about the usage of a floor nailer, you also should know about the other hardwood flooring installation steps to completing the process.
So, the first three steps are related to the hardwood flooring installation, and the other four steps are directly dealing with how to use a floor nailer.
Understanding the Parts of a Floor Nailer
A flooring nailer is composed of several vital parts that work together to drive nails into your flooring material.
Nail Magazine: This is the part of the floor nailer that holds the nails. It is usually long and box-shaped and can hold a strip of nails that are fed into the nailer as you work.
Trigger: The trigger is the part of the nailer that you press to drive the nail into the floor. Some nailers have a safety feature that requires the nose to be pressed against the work surface before the trigger can be activated.
Base Plate or Shoe: This is the bottom part of the nailer that rests on the floor. It helps to guide the nail into the right place and protects the floor surface from getting damaged.
Handle: The handle is where you hold the nailer and control its movements. Some nailers have a padded handle for extra comfort during use.
Nose: The nose of the nailer is where the nail exits when you pull the trigger. It is designed to fit snugly against the flooring material to ensure accurate nail placement.
Types of Nails Suitable for Floor Nailers
When it comes to selecting nails for your floor nailer, consider the type of flooring material you’ll be working with, as this can greatly influence your choice.
Flooring Cleats: These are the most common types of nails used in flooring nailers. They have a distinct L-shape and are ideal for hardwood flooring due to their strong holding power.
Flooring Staples: These are typically less expensive than cleats and have two prongs that hold the flooring very firmly. However, they can cause splitting in some types of wood, so they’re best for softer materials like engineered wood.
Flooring Nails: These are standard nails with a flat head and are suitable for most types of flooring. They’re easy to use but do not hold as strongly as cleats or staples.
Difference Between a Nailer and a Staple Gun?
If you’re tackling a home improvement project that involves attaching materials to wood, you may be wondering whether to use a nailer or a staple gun.
Both tools can be very effective, but there are some key differences that you should be aware of.
Nailers use small nails to secure materials in place, while staple guns use staples. Staples are generally much wider than nails, so they provide more surface area for holding the material in place.
However, they can also be more difficult to remove if you need to make any adjustments.
Nailers are also typically smaller and lighter than staple guns, making them easier to handle and maneuver around tight spaces.
When choosing between a nailer and a staple gun, it’s important to consider the specific needs of your project. If you’re working with delicate materials or need to make precise adjustments, a nailer may be the better option.
However, if you’re looking for a more heavy-duty solution, a staple gun may be the way to go.
Related Topic: 7 Best Electric Hardwood Floor Nailers: Corded/Cordless
How to Use a Floor Nailer?
Before we start, you should know about the other tools that you must need with a floor nailer to use. If you don’t you won’t complete the nailing process at all.
There are four extra tools you should have:
- Nails
- Rubber Mallet
- Measuring tape to measure the floor thickness
- Air compressor
Let’s begin with how to use a floor nailer!
Step 1- Determining the Flooring Direction
What is the flooring direction? How will it look at the end? All these questions come to mind when you start installing a hardwood floor in your home.
Aligning the planks parallel to the longest wall is the best and most common way to install hardwood flooring. This is so because it technically provides the best look at the end.
You can still choose any other direction, you like the most. And you think it looks better than the other one.

Step 2- Place a Vapor Barrier
If you want to achieve professional results it is important to place a vapor barrier on the side of the walls. This will help fight against moisture in the winter and fight against heat in the summer.
Often the vapor barrier is composed of a thin film such as polyethylene that protects the wall and the floor from water vapor diffusion.
So, to get better and long-lasting results from hardwood flooring you have to place it before starting the installation.
Step 3- Establish a Perimeter
Establishing a baseline and perimeter is an important and crucial step to ensuring that your floor surface looks straight and stable. You should leave a gap around the perimeter of your room.
If you don’t leave this gap, your flooring will buckle because it does not have a capacity contract to expand.
Leave a 1/2 inch gap when installing flooring that is solid wood throughout.
And for an engineered hardwood floor installation you should leave a gap of 1/4 inch.
Step 4- Selecting the Correct Size of the Adapter Plate
Measuring the thickness of your hardwood floor is the very first step you have to do. And here you need measuring tape for an accurate measure.
Remember, you can’t do it using a rough estimate because you need to select an accurate size of the adapter plate.
Using rough estimates can affect your hardwood flooring installation badly and change the final look of the floor.
So, avoid rough estimates and always use measuring tools to maintain accuracy.
The other reason for measuring a hardwood floor thickness is when you bought hardwood flooring they sold you in square feet of your home.
So, to accurately install the hardwood flooring, you need to multiply your all room’s lengths to their width.
When you are done with measuring you have to use the same measurements to select the accurate adapter size and nails in the floor nailer.
After that, attach the adapter plate with the nailer and load the appropriate size nails in the nailer magazine.
You are done with the first step!
Step 5- Connecting the Air Compressor with the Nailer
You need an air compressor with an accurate size that should produce adequate air volume and suitable air pressure for the nailer.
There are multiple types of air compressors available on the market but you have to choose according to your need.
An ideal air compressor for a nailer should have a 90 psi setting for a nailer gun, a 2-horsepower electric supply, and a 6-gallon tank capacity.
The weight of the air compressor should be less than 80 pounds so it will be easy to carry and lift while nailing a hardwood floor.
Before connecting the floor nailer to the air compressor you have to use compression fittings on the air hose and check whether the connection settings are tightly secured or not.
Step 6- Setting the Air Pressure
When it comes to setting the air pressure on the air compressor you need to read the instructions manual given with the nailer.
The psi (pound per square inch) could be different for every air compressor according to their stats.
But you need to select an accurate PSI that should be suitable to use with your air compressor. So, adjust the pressure gauge wisely in this step.
Step 7- Nailing Down Your Planks
Once you have positioned your floor nailer correctly, slowly pull back on the trigger to drive a nail into each corner of the wood plank.
Make sure that you are using enough pressure to penetrate into both pieces of wood without splitting them apart or causing any other damage. It usually takes two nails per corner for proper installation. Repeat this step until all four corners are securely nailed down.
Step 8: Finishing Up
After all your planks are evenly secured, use a hammer to tap in any nails that didn’t sink all the way. Once you have finished nailing down your floor with the nailer, it is important to clean up and dispose of any leftover debris from the project.
Necessary Safety Measures
Before operating a floor nailer, it is crucial to take certain safety measures to prevent accidents or injuries. Start with wearing appropriate work attire, such as safety glasses to protect your eyes from flying debris and sturdy, closed-toe shoes to protect your feet.
It’s also advisable to use ear protection, as nailers can generate a significant amount of noise.
Gloves can help prevent blisters, but ensure they don’t impede your grip or dexterity. Regularly inspect the nailer for any damage or malfunctioning parts always use a fully functional tool.
Lastly, maintain a clean workspace. Any excessive dust or debris on the floor can affect the nailer’s performance and potentially cause accidents.
Remember, safety should be your utmost priority when handling any power tools, including floor nailers.
Wrap up
Using a floor nailer is an easy and effective way to install hardwood flooring in your home. With the right safety precautions and some practice, you can get your project done quickly and efficiently. Before long, you’ll be enjoying the beautiful new floors in your home!
Happy nailing!
FAQs
Is it better to use a nail gun to install a hardwood floor?
Nail guns are quick and automated saving you time. But still, it is not a recommended way because it varies to nail size and configuration. So, it is not a suitable option. Using a floor nailer always would be better than a nail gun.
Can I use a nail gun or floor nailer on a laminate floor?
There is no need for a floor nailer or nail gun while installing laminate flooring. To install laminate flooring you only need a hammer or a rubber mallet from tools.
What size of nails should I use for hardwood floor nailing?
The basic and ideal rule of using the nails for hardwood floor nailing is 1-1/2 inch nails for a floor with 1/2 inches thickness and 1-3/4 inch nails used for a floor with 3/4 thickness. It may vary according to the flooring manufacturer’s recommendations.
You have brought up a very great details, regards for the post.
I got what you mean , thankyou for posting.Woh I am delighted to find this website through google. “Money is the most egalitarian force in society. It confers power on whoever holds it.” by Roger Starr.
As soon as I observed this site I went on reddit to share some of the love with them.
Say, you got a nice blog article.Much thanks again. Great.
I truly appreciate your work, Great post.
Thank you for your sharing. I am worried that I lack creative ideas. It is your article that makes me full of hope. Thank you. But, I have a question, can you help me?