
Removing floor mat clips from your vehicle can be an intimidating task, especially if you’re not familiar with the process. Floor mats are often secured in place by clips that attach to the vehicle’s floorboard.
Removing these clips is a relatively simple process that requires minimal tools and can usually be done in a matter of minutes. This tutorial will show you how to remove floor mat clips from your vehicle in a few easy steps.
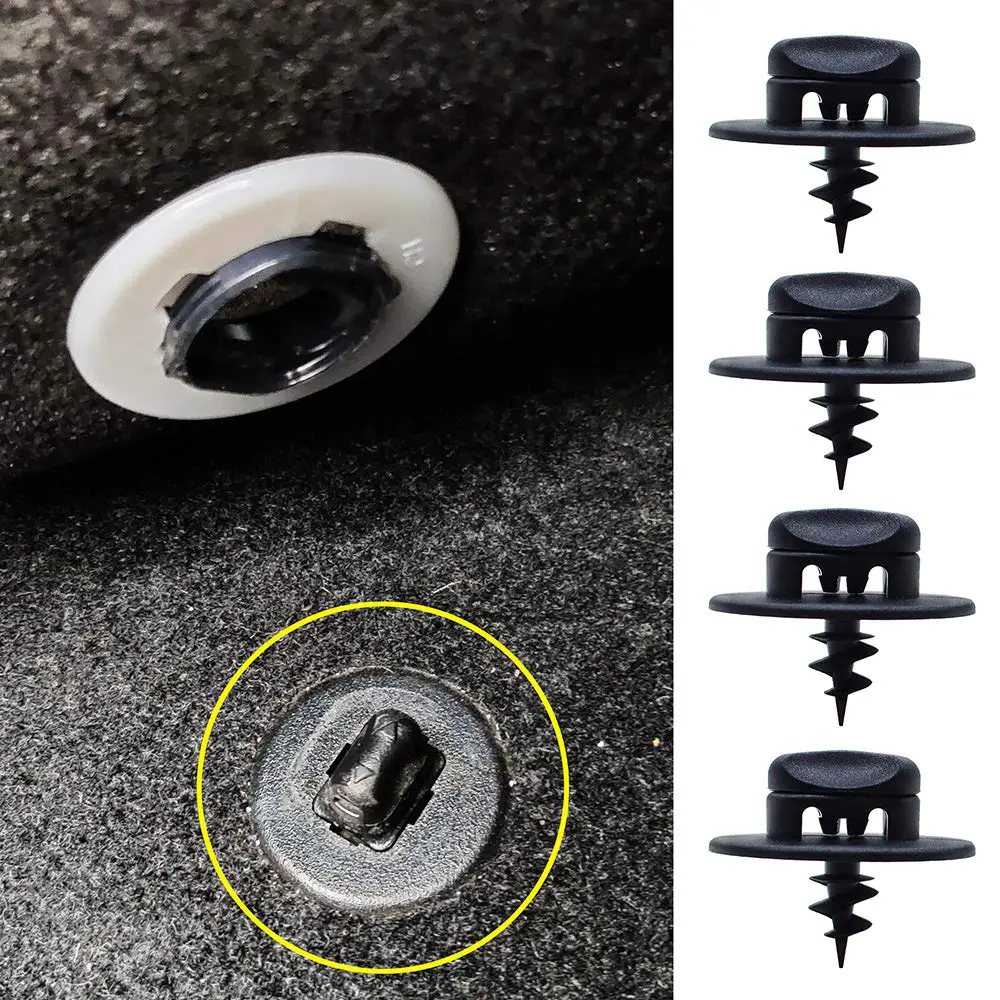
Purpose of floor mat clips
Floor mat clips are designed to keep floor mats in place, preventing them from slipping around or getting stuck under the pedals. This is especially important for drivers who need to maintain precise control over their vehicle’s movements.
Although floor mats can be secured with adhesives, clips provide added security and help ensure that your floor mats stay in place.
Why you may need to remove them
In some cases, you may need to remove the floor mat clips in order to access other parts of your vehicle that are located underneath them. This could include parts such as wiring or electronic components.
Additionally, if you’re replacing the floor mats in your car, you’ll need to take out the clips first.
Materials Needed
List of tools and safety equipment
Before beginning, you’ll need to gather the necessary tools and safety equipment. This includes:
- Flathead screwdriver
- Safety glasses
- Work gloves
Other materials to have on hand
You may also find it helpful to have the following items nearby:
- A bucket or container for catching any loose screws that fall out
- A rag or towel to wipe away any dirt and debris
Preparation
Safety precautions before starting the process
Before beginning the process of removing the floor mat clips, it’s important to take a few safety precautions. First and foremost, you should always wear safety glasses and work gloves when working with any kind of tools or equipment.
Additionally, if the area is cramped or difficult to access, you may want to use a flashlight for improved visibility.
Preparation of the working area
You’ll also want to make sure that the working area is clean and free from any debris or dirt. This includes vacuuming or sweeping the floor mats, as well as wiping away any dust and dirt from around the clips.
Locating the Floor Mat Clips
How to identify the clips that need to be removed
The first step is to locate the clips that need to be removed. Generally, these will be found around the edges of the floor mats. They may also be located near any access points, such as under seats, in-door jams, or behind consoles.
If you can’t find them easily, try doing a quick search online for diagrams of your car’s interior and locating the clips.
Removing the Clips
Step-by-Step Instructions for Removing the Clips Safely
Position the Screwdriver: Take your flathead screwdriver and carefully position it in the gap between the clip and the floor mat. Ensure the tool is firmly in place before proceeding to the next step.
Apply Pressure: Apply slight pressure to the screwdriver, aiming to loosen the clip without damaging the surrounding area. Make sure your movements are controlled and steady.
Pry the Clip: Gradually pry the clip upwards. Be patient and avoid using excessive force as this can damage the clip or the floor mat. If the clip is resistant, wiggle the screwdriver slightly to help loosen it.
Remove the Clip: Once the clip is significantly loosened, you should be able to pull it out easily. Use your gloved hand to remove the clip completely, making sure not to lose it.
Inspect the Area: After the clip is removed, inspect the area for any damage. If necessary, clean the area before installing a new clip.
Remember, safety is paramount. Always wear your safety glasses and gloves to protect yourself throughout this process. Take your time, and if a clip doesn’t come free easily, reposition your tool and try again.
Post-Removal Process
Checking the floor mat and area for any damage
After removing the clips, it’s important to check the floor mat and surrounding area for any damage. If anything looks worn or cracked, you should consider replacing it before reinstalling the clip.
Additionally, if there is any debris in the area of the clip, make sure you clean it out before reattaching your floor mats.
Cleaning the area

Clean the area of the clip with a soft cloth before reinstalling the mat. This will help to prevent dust and dirt from interfering with your floor mats once they’re back in place.
Additionally, be sure to inspect the clip itself for any damage or wear and tear. If it’s significantly damaged, replace it before attaching it to your vehicle.
Reinstallation of New Clips
Guideline for Installing New Floor Mat Clips
If the old clip is damaged and needs to be replaced, follow these steps:
Get New Clips: First, purchase a new clip that matches the specifications of your car’s flooring. Ensure that the new clip has the correct size and shape for secure attachment.
Position the Clip: Next, position the new clip precisely where the old one was. It’s essential to line up the clip correctly so the floor mat fits snugly and doesn’t move while driving.
Insert the Clip: Using a gloved hand, push the new clip into place. Make sure that it’s secure and flush with the vehicle’s floor.
Attach the Mat: Finally, align the floor mat’s holes with the clips and press down until it clicks into place. Check to make sure the mat is secure and not moving around.
Always ensure to follow these guidelines to securely and safely install new floor mat clips in your car. Proper installation will ensure the longevity of your floor mat and provide added safety while driving.
Related Topics:
Conclusion
Installing new floor mat clips is a relatively easy task that requires minimal tools and time. Make sure to always inspect the clip for wear and tear before attaching it to your car, and ensure that you clean the area before reinstalling your floor mat. Following these steps will help to keep your vehicle in good condition and provide added safety while driving.
FAQs
What type of clips do I need to attach to my floor mat?
The type and size of clip you need will depend on the specifications of your car’s flooring. Make sure to check the owner’s manual for details about what type of clip is compatible with your vehicle.
How do I know if my clip needs to be replaced?
If you notice any signs of rust or wear and tear on the clip, it’s best to replace it. Rust can weaken the clip and lead to premature breakage. Also, check for cracks or other signs of damage that can cause your floor mat to come loose while driving.
Are there any precautions I should take when reinstalling my floor mat?
Yes, always make sure to clean the area before attaching your floor mat. Dirt or debris can cause the clip to become loose and increase the risk of an accident while driving. Also, inspect the clip for signs of wear and tear before installing it in your car.
2 thoughts on “How To Remove Floor Mat Clips | DIY Tutorial”