Installing a floating wood floor is an excellent way to add warmth and beauty to any room in your home. Unlike traditional hardwood flooring, there is no need for nails or glue, making it a popular choice for DIY homeowners. This type of flooring is also known as engineered wood, and it consists of several layers of plywood or HDF with a top layer of real hardwood.
In this guide, we will go through the step-by-step process of installing a floating wood floor and provide you with all the necessary information to help you get started.
Advantages of a Floating Wood Floor
Floating wood floors offer several noteworthy advantages that make them an excellent option for many homeowners. For starters, their installation is straightforward and does not require specialized tools, making them an ideal choice for DIY enthusiasts.
They are also highly versatile and can be installed over various types of subfloors, including concrete and existing flooring.
Additionally, floating wood floors are known for their durability and longevity, thanks to the multiple layers of plywood or HDF that offer stability and resist warping. The top layer of real hardwood not only adds aesthetic appeal but also allows for sanding and refinishing if needed, extending the life of the floor.
Lastly, these floors are more resistant to moisture and temperature changes compared to traditional hardwood, making them suitable for use in a wider range of environments.
Materials and Tools Needed
List of necessary tools
- Measuring tape
- Pencil
- Safety glasses
- Dust mask
- Hammer and tapping block (or mallet)
- Flooring spacers
- Pry bar or pull bar
List of required materials:
- Floating wood floor panels
- Underlayment
- Foam underlayment for use over concrete subfloors.
- Vapor barrier (if installed over concrete subfloor)
- Transition pieces (e.g., T-moulding, thresholds)
- Finishing nails or staples
List of required materials
for subfloor preparation:
- Subfloor nails or screws
- Pry bar
- Leveling compound (if needed)
Preparation
Measuring the Room
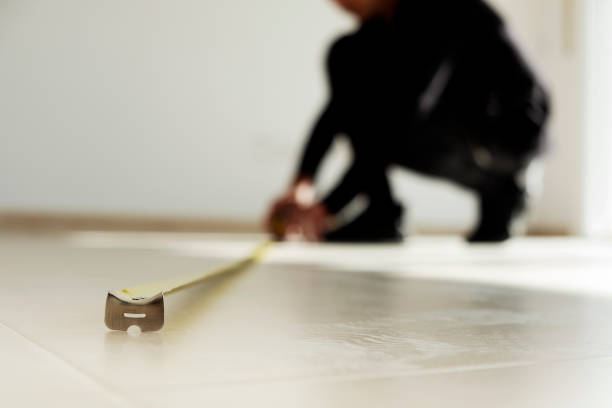
Before beginning the installation process, it’s crucial that you accurately measure the room to determine how much flooring material you’ll need. Start by measuring the width and length of the room using a measuring tape.
Multiply these two measurements to calculate the room’s total square footage. It’s advisable to purchase an extra 10% of flooring material to accommodate for cuts and potential mistakes.
Remember to also measure and note down the size of any closets or alcoves in the room, as these will also require flooring. Don’t forget to plan for the placement of transition pieces at doorways or where the new floor will meet an existing floor.
Preparing the Subfloor
Once you have all the necessary materials and measurements, the next step is to prepare the subfloor. Start by removing any existing carpet, tile, or other flooring material.
Any remaining adhesive or debris should be scraped off to ensure a clean, flat surface. If the subfloor is plywood or OSB (Oriented Strand Board), inspect it for any protruding nails or screws. These should be hammered down or removed.
For concrete subfloors, check for any cracks or uneven areas. If you discover any, use a leveling compound to create a smooth surface. With the subfloor clean and level, you’re ready to install the vapor barrier (if needed) and underlayment.
Cut and lay the vapor barrier so that it covers the entire surface, overlapping the edges by about 8 inches, and securing it with a strong adhesive tape. For the underlayment, roll it out over the vapor barrier and cut it to fit, ensuring it reaches all the edges of the room.
Tape the seams to create a continuous barrier. This process will create an ideal surface for your floating wood floor, promoting durability and longevity.
Acclimating the Wood
After preparing the subfloor, it’s imperative to acclimate the wood before installation. Wood is a natural product and can expand or contract based on the moisture and temperature conditions of the environment.
Start by opening all the boxes of flooring and stack the planks in a staggered pattern for effective air circulation. Ideally, the room should have a stable temperature of between 60-80°F (15-27°C) and a relative humidity of 30-50%.
Maintain these conditions for a minimum period of 48-72 hours, allowing the wood flooring to adjust to the room’s conditions.
This process significantly reduces the risk of warping or buckling post-installation, ensuring your floating wood floor retains its aesthetic appeal and structural integrity over time.
Installation
1. Layout and Design Planning
Before you begin the actual installation of your floating wood floor, it’s crucial to plan the layout and design. This step helps to ensure a visually pleasing result and simplifies the installation process. Start by determining the direction in which your floorboards will run.
Typically, boards are laid parallel to the longest wall of the room or in the direction of incoming light from the main windows. After you’ve decided on the direction, measure the room accurately to calculate the number of boards you will need.
Keep in mind that it’s advisable to order a little extra to account for cutting and fitting waste. Also, plan for expansion gaps around the room’s perimeter.
Typically, a gap of 1/4 – 1/2 inch is standard to allow for natural expansion and contraction of the wood. Sketching out a scale diagram may be helpful during this phase to visualize board placement, accounting for doorways and other obstacles.
2. Installing the Underlayment

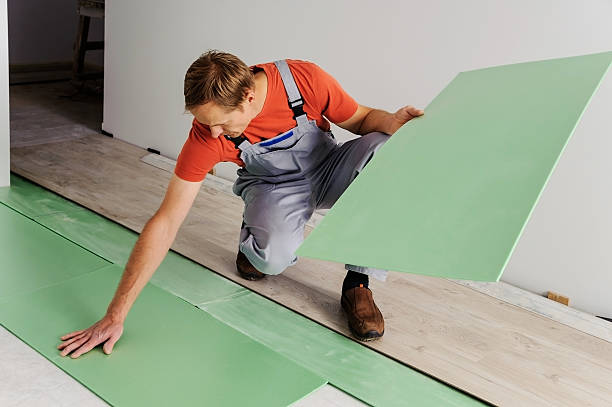
The next step in installing your floating wood floor is laying down the underlayment. This is a crucial part of the installation process, as the underlayment protects the flooring from moisture and provides a sound barrier.
Begin by rolling out the underlayment across the length of the room, ensuring it runs in the same direction as your planned floorboards. Cut the underlayment to fit the room dimensions, leaving an excess of around 4 inches at each wall to ensure complete coverage.
Overlap the seams by roughly 8 inches and secure them with strong adhesive tape to create a moisture barrier. Ensure the surface is smooth and free of creases or bumps, which could affect the final appearance of your wooden floors.
Once the underlayment is laid out uniformly across the entire floor, trim the excess material from the edges. Now, your floor is adequately prepped for the actual wood flooring installation.
3. Putting the First Row

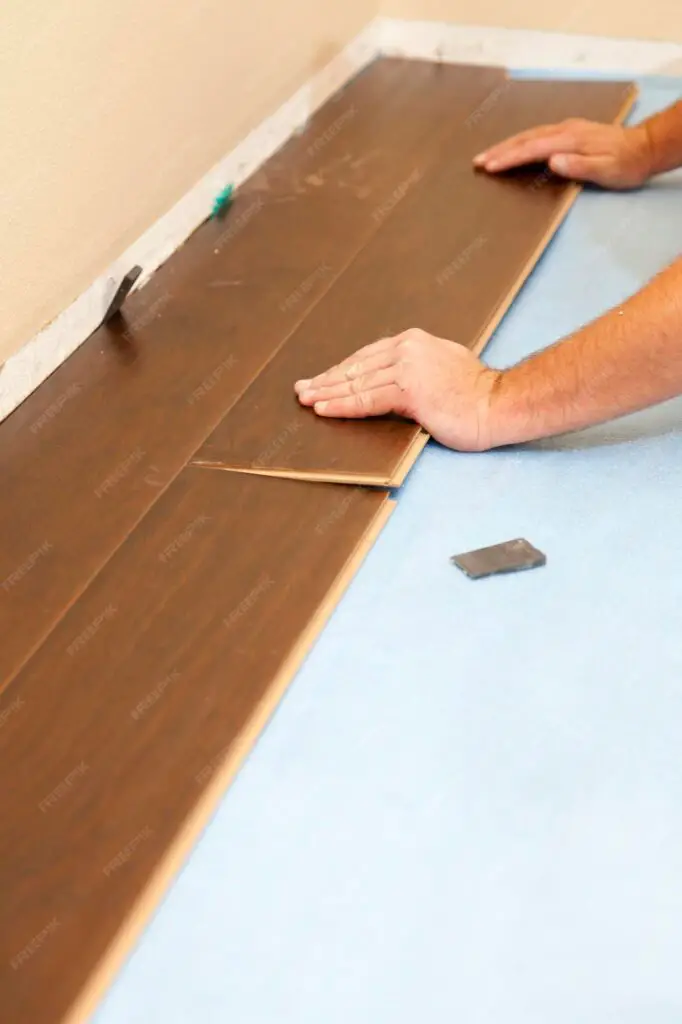
Commencing the floating wood floor installation, start by placing your first board in the corner of the room. Ensure that the groove side is facing the wall, adhering to the expansion gap you’ve planned for.
Take the next piece of flooring and align the end tongue into the end groove of the initial board. Apply gentle pressure to click them together.
Continue this process along the length of the wall, cutting the final board in the row to size if necessary. Remember to keep the cut-off end of the last board, as it can be used to start the next row, providing it’s at least 8 inches long.
This creates a staggered pattern, integral to a professional and aesthetically pleasing finish. Ensure the first row is straight; a crooked first row will lead to complications as you proceed. Use spacers against the wall to maintain the expansion gap uniformly across the row.
This first row serves as a foundation, so take the time to get this right to ensure a successful installation.
4. Installing the Remaining Rows
For the subsequent rows, you’ll continue in a similar fashion to the first. Start with the leftover piece from the previous row, ensuring it’s at least 8 inches long. If it isn’t, begin the row with a new board, cut to create a staggered effect.
Take the board for the new row and align its long side tongue into the groove of the board in the previous row at an angle, and then lower it to click into place. For the next board, connect the short end first before locking the long side. It should form a solid, secure connection with no gaps.
Continue this process, ensuring that the ends of boards in adjacent rows are staggered by at least 6 inches to maintain an appealing and stable staggered pattern. Use a tapping block if necessary to gently lock the boards together, but avoid hitting the board directly to prevent any damage.
After completing each row, check for and quickly rectify any gaps or misalignments. As you near the other end of the room, you may need to cut the boards lengthwise to fit. Ensure you maintain the required expansion gap at this end of the room as well.
5. Installing the Final Row

The final row might be the most challenging because it often requires a customized fit. Measure the gap between the last row installed and the wall. Subtract the size of the expansion gap from this measurement.
Now, mark this measurement on the new board starting from the groove side. Draw a line along the length of the board and cut along this line.
Before installing, ensure the cut board fits in the space. Just like the previous rows, place the long side tongue into the groove of the board in the preceding row at an angle and lower it into place. Again, remember to maintain the expansion gap.
Use a pull bar to install these final pieces if the space is too tight for your tapping block.
Related Topics:
Post-Installation
Finishing Touches and Clean-Up
Once all the floorboards have been installed, it’s time to add the finishing touches. Replace the baseboards or install new ones, if necessary. If you had to remove the door casing, now is the time to cut it to the height of the new floor and reinstall it.
Be sure to install any transition strips where the new floor meets a different type of flooring in your home.
After all the finishing work is done, it’s time to clean up. Vacuum or sweep your new floor to remove any dust or debris. Wipe it down with a damp cloth or mop, but ensure you don’t oversaturate the floor with water as it could damage the wood.
Dispose of or recycle any leftover materials properly.
Finally, move your furniture back into the room, placing felt pads under the legs to prevent scratches on your new floor. Now, you can enjoy the beautiful, fresh look of your new floating wood floor.
Maintenance Tips
Caring for your new floating wood floor is key to preserving its beauty and ensuring its longevity. Here are some practical tips:
Regular cleaning: Sweep or vacuum your floor regularly to remove dust, dirt, and grit that could scratch the wood. Avoid using a vacuum with a beater bar as it could damage the floor surface.
Prompt spill cleanup: If a spill occurs, clean it promptly to prevent the wood from warping or staining. Avoid using excessive water, and make sure to dry the area thoroughly after cleaning.
Use of proper cleaning products: Use cleaning products specifically designed for wood floors. Avoid using oil soaps, abrasive cleaners, or any cleaner that promises to restore shine.
Furniture pads: Regularly check and replace the felt pads under your furniture legs to prevent scratching.
Avoid direct sunlight: Prolonged exposure to direct sunlight can cause your wood floor to fade. Use curtains or blinds to protect your floor from excessive sunlight.
Regular inspections: Regularly inspect your floor for signs of damage. If you notice any areas that require repair, it’s best to address these issues promptly.
Related Topics: 7 Best Steam Mops for Hardwood Floors
Conclusion
Installing a floating wood floor is a challenging but rewarding project that can significantly enhance the overall look and feel of your home. With proper preparation and careful execution, you can achieve professional-looking results without breaking the bank.
So, if you’re up for the challenge, go ahead and give it a try! And remember, don’t hesitate to seek help from professionals or consult online resources if you encounter any difficulties.
With the right tools, techniques, and a bit of patience, you can have a beautiful floating wood floor in no time. Good luck! So, don’t wait any longer. Start your DIY project today and enjoy the benefits of a stunning and durable floating wood floor for years to come. Happy installing!


2 thoughts on “How To Install Floating Wood Floor? 5 Steps Guide”