

Laminate flooring is an affordable, stylish, and durable option for your kitchen. While installing laminate flooring can seem intimidating at first, it’s actually a relatively straightforward process that can be completed in one day if you have the right tools and materials.
Here’s a step-by-step guide to help you install laminate flooring in your kitchen like a pro.
Step 1: Prepare the Subfloor
Credit: Getty Images/iStockphoto
Before you begin installing your laminate flooring, make sure the subfloor is properly prepped. Start by checking for any high spots or uneven areas that may cause bumps in your new flooring.
If there are any irregularities, use a belt sander or router to sand them down until they are level with the rest of the subfloor.
Once this is done, sweep and mop the subfloor to remove any dust or debris that could interfere with installation.
Types Of Subflooring
1. Plywood
Plywood is a popular type of subflooring that is made from thin sheets of wood that are glued together. Plywood is strong and durable, and it can be used for both new construction and remodeling projects.
2. OSB
OSB, or oriented strand board, is another popular type of subflooring. OSB is made from small pieces of wood that are glued together and then pressed into a sheet. OSB is less expensive than plywood, but it is not as strong.
3. Particleboard
A particle board is a type of subflooring that is made from small pieces of wood or other materials that are glued together. Particle board is less expensive than plywood and OSB, but it is not as strong or durable.
4. Fiberboard
Fiberboard is a type of subflooring that is made from small pieces of wood or other materials that are glued together. Fiberboard is less expensive than plywood, OSB, and particle board, but it is not as strong or durable.
5. Cement board
A cement board is a type of subflooring that consists of cement sandwiched between two layers of fiberglass mesh. Cement board is strong and durable, but it is more expensive than other types of subflooring.
Related Topic: Best Waterproof Subfloor Material: 6 Options
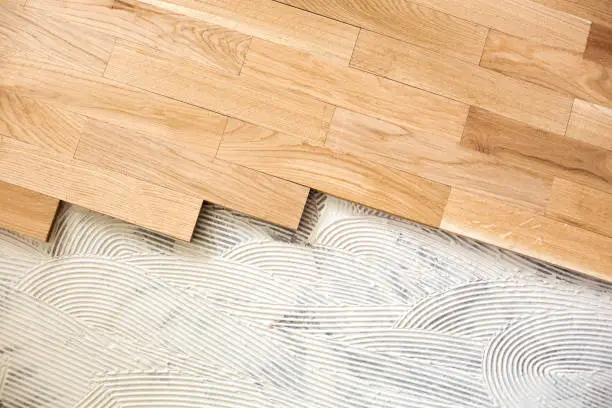
Step 2: Lay Down Underlayment
Credit: Getty Images/iStockphoto
Underlayment is key when it comes to installing laminate flooring because it helps provide cushion and noise reduction while also protecting your floors from moisture damage.
Lay down one layer of vapor barrier underlayment before starting installation; make sure to pay special attention to seams and corners where water can seep in.
After laying down each row of planks, cut off excess underlayment with a utility knife so that it fits snugly around walls and obstacles.
Best Underlayments For Laminate Flooring
1. Foam Underlayment
Foam underlayment is one of the most popular types of underlayment for laminate flooring. Foam underlayment is made from a variety of materials, including polyethylene, polystyrene, and PVC.
Foam underlayment is lightweight and easy to install, and it provides excellent sound and thermal insulation.
2. Cork Underlayment
Cork underlayment is another popular type of underlayment for laminate flooring. Cork underlayment is made from compressed cork particles and is designed to provide excellent sound and thermal insulation.
Cork underlayment is also resistant to mold and mildew, making it a good choice for areas that are prone to moisture.
3. Rubber Underlayment
Rubber underlayment is a less common type of underlayment for laminate flooring, but it can be a good choice in certain situations. Rubber underlayment is made from recycled tires and provides excellent sound and thermal insulation.
Rubber underlayment is also resistant to mold and mildew, making it a good choice for areas that are prone to moisture.
Related Topic: Laminate Flooring With Attached Underlayment Pros and Cons
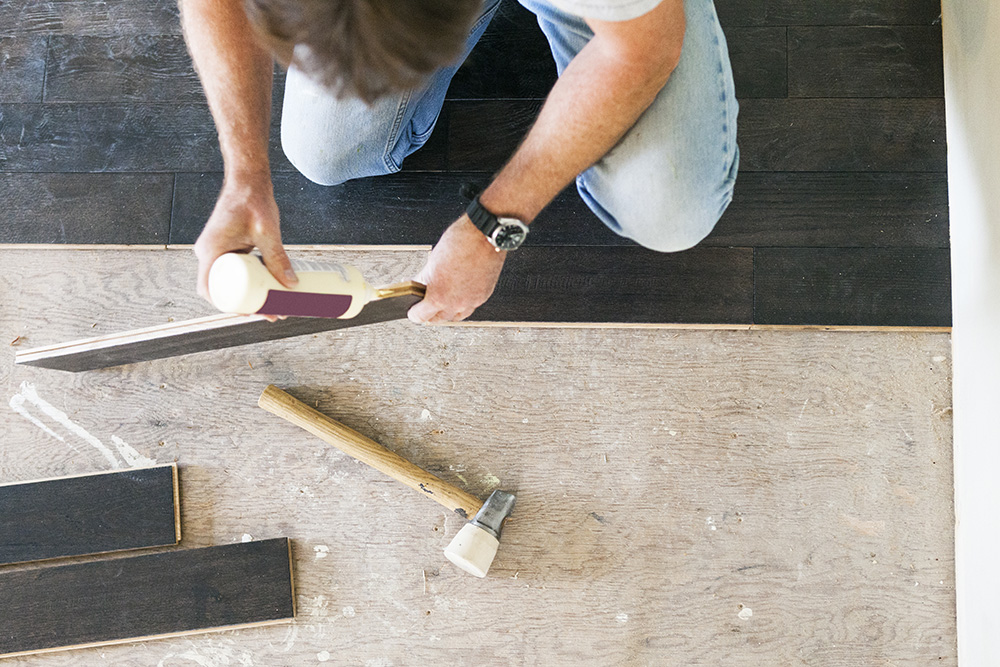
Step 3: Install the Floor Planks
Now for the fun part! Start by laying down planks along the longest wall in your kitchen (usually adjacent to other rooms). Make sure the planks are flush against both walls with no gaps between them; if necessary, use shims beneath planks to make sure they fit correctly along walls and around obstacles.
After this row is complete, move on to subsequent rows; make sure each plank locks securely into place before moving on to the next one.
As you get close to walls or appliances, you may need to cut some planks shorter or longer in order for them to fit properly; use a jigsaw or table saw for larger cuts, or just score along straight lines with a box cutter and snap pieces off as needed for smaller cuts.
Once all planks have been installed, check again for tightness along edges if necessary adjust shims accordingly and ensure that transitions between rooms are even and tight fitting.
Installation Cost
Installing laminate flooring is a great way to add an instant facelift to your home, and the cost can be surprisingly manageable!
Depending on the size of the room, installing laminate flooring can range in price from as low as $1-2 per square foot all the way up to around $6 a foot.
Higher quality materials and services will naturally come with a higher cost, so it’s important to shop around for the offers that are right for you.
While this can be time-consuming, it’s well worth the effort! Ultimately, with careful consideration and some creative problem-solving, you’ll have newly refreshed floors without breaking your budget.
Material Cost
The material cost of the laminate flooring itself isn’t too high, with options ranging anywhere from $1 to $10 per square foot, depending on the type of plank you purchase and whether or not you choose special features.
This makes it more affordable than other hardwood style options like ceramic tile or hardwood which can get much costlier.
However, don’t forget that there are extra costs associated with installation and materials required to properly lay the flooring.
Safety Tips to Install Laminate Flooring
1. Read the Instructions
The first step to safely installing laminate flooring in your kitchen is to make sure that you read the instructions that come with your flooring.
These instructions will provide you with important information about how to properly install your flooring, and they will also help to ensure that you do not damage your flooring during the installation process.
2. Clear the Room
Before you begin installing your laminate flooring, you will need to clear the room of all furniture and appliances. This will give you plenty of space to work, and it will also help to prevent any damage to your flooring or furniture.
3. Prepare the Subfloor
Once the room is clear, you will need to prepare the subfloor for installation. This may involve cleaning the subfloor and making sure that it is level.
If there are any cracks or holes in the subfloor, they should be filled in with a suitable filler before proceeding.
4. Install Underlayment
Underlayment is a thin layer of material that is installed between the subfloor and the laminate flooring. Underlayment can help to reduce noise and provide additional cushioning, making it an important step in the installation process.
5. Install the Flooring
After the underlayment has been installed, you can finally begin installing the laminate flooring itself. Starting at one end of the room, snap each piece of flooring into place until you reach the other end of the room.
Once all of the pieces are in place, trim any excess material with a sharp knife
Avoiding Damage to Kitchen Laminate Flooring
Heat Damage
Excessive heat can cause serious damage to laminate kitchen floors. If an area rug or mat is placed in front of the sink or stove and left there long-term, it can trap heat from these appliances and cause warping or buckling in the laminate.
To avoid this problem, move mats and rugs regularly so that they don’t trap excess heat in one spot for too long.
Heavy Appliances
Heavy appliances like refrigerators are another potential threat to your kitchen laminate flooring; if they remain in one spot too long, they can actually leave indentations in the flooring due to their weight.
If you must store an appliance on top of your kitchen laminate floor, either use felt pads underneath it or periodically move it around so that all areas of the floor receive an equal amount of pressure over time.
Spills & Stains
Finally, spills and stains can also wreak havoc on laminate floors in kitchens. Be sure to promptly clean up any liquids that strike your floor; this will help keep them free from discoloration and other types of staining that may occur if left untreated for too long.
Additionally, avoid placing wet items directly onto your laminate surface as this could lead to further staining down the line.
By following these simple tips, you should have no trouble maintaining the integrity of your kitchen’s laminate flooring for years to come!
Laminate floors are attractive and durable but not indestructible. So make sure you’re taking steps to protect them from common causes of damage such as heat exposure, heavy appliances, spills & stains, etc.
Related Topic: All You Need to Know About Industrial Wood Flooring!
Conclusion
With these steps as your guide, you should now be able to install laminate flooring in your kitchen like a pro!
Installing laminate doesn’t require any specialized tools or skills just patience and precision will do so why not give it a try?
With minimal effort but maximum impact on the style and comfortability levels of your home’s interior design scheme, you won’t regret it! Get started today and enjoy beautifully finished floors tomorrow!
FAQs
Is it a good idea to put laminate flooring in the kitchen?
Installing laminate flooring in the kitchen can be a great choice for people that like to keep up with modern trends. Both affordable and water-resistant, laminate flooring is easy to maintain and offers durability that can stand up to kitchen traffic and frequent spills.
It also comes in a large variety of colors and styles, so you’re sure to find an option that fits your space’s decor.
Do kitchen cabinets go on top of laminate flooring?
Installing kitchen cabinets on laminate flooring can be a tricky process, however, it is doable. To ensure proper installation and prevent cabinet damage, it’s important to take necessary precautions like using the appropriate adhesive and installing insulation under the cabinets on the floor.
With the right preparation and know-how, you can properly install kitchen cabinets on your laminate floors.
Where should you not put laminate flooring?
Laminate flooring should not be put in areas with a high amount of moisture such as bathrooms, basements, and laundry rooms. It is also advised that this type of flooring not be used on stairs or steps due to safety concerns.
Additionally, laminate floors are not made to withstand outdoor conditions and thus should not be installed outside. For best results, keep the laminate dry and away from sources of extreme temperature or humidity.