
Smartcore tiles are a great alternative to traditional ceramic tiles, and they can bring a unique look and feel to any room. Installing Smartcore tiles requires minimal effort but has the potential for stunning results. With these simple steps, you’ll have your new tiled floor in no time!
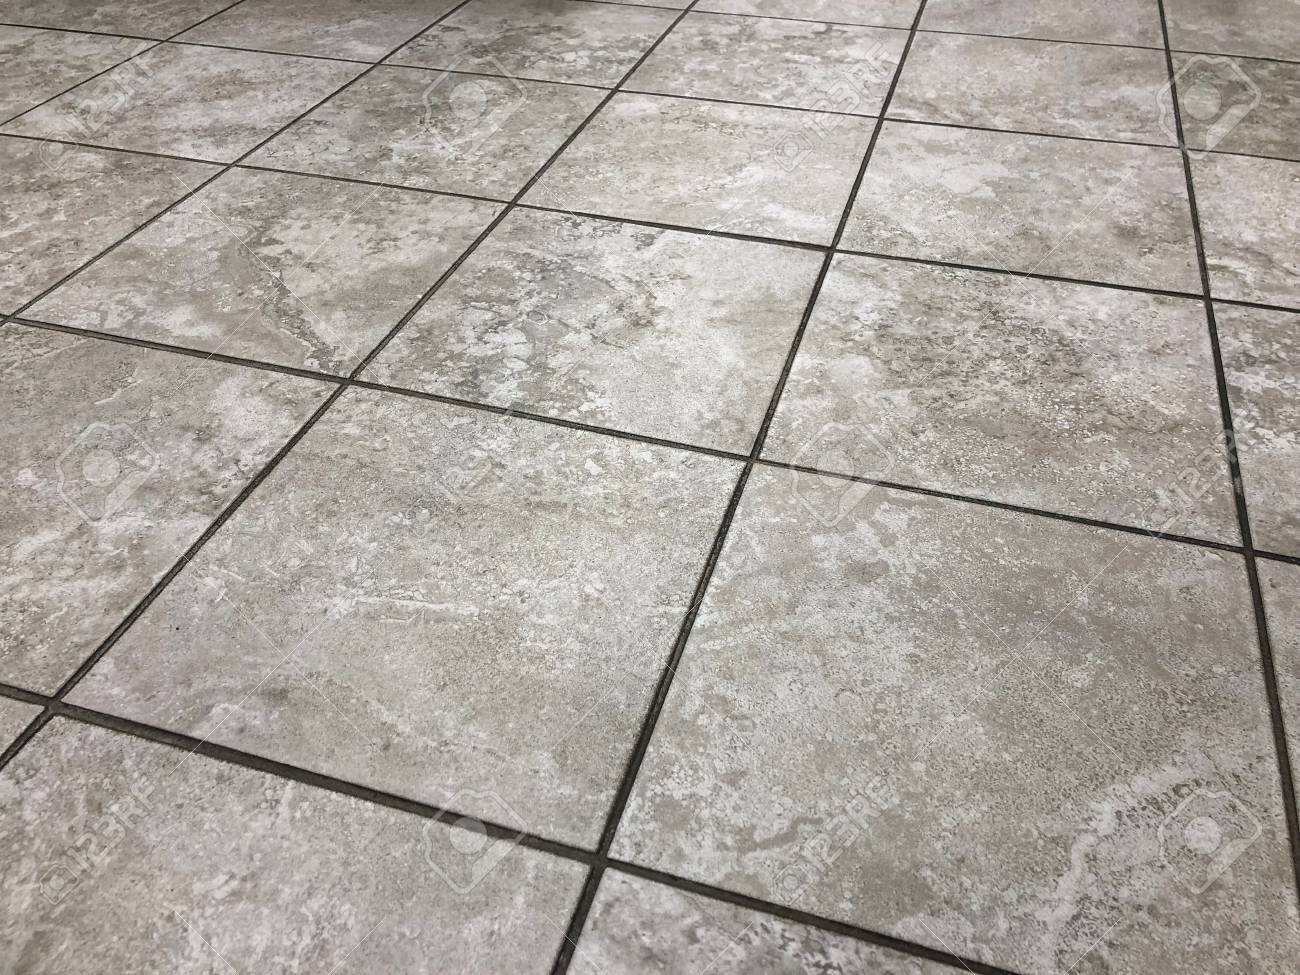
Smartcore tiles are made from a combination of recycled wood fiber and vinyl, making them highly durable and waterproof. The tiles feature a patented locking mechanism that allows them to fit together easily without the need for adhesive or grout.
They come in a variety of colors and styles so you can create a flooring solution that reflects your style and personality.
Benefits of Choosing Smartcore Tile
Choosing Smartcore tiles comes with a myriad of advantages. First and foremost, the durability and waterproof nature of these tiles makes them ideal for areas prone to moisture, such as bathrooms and kitchens.
Furthermore, the patented locking mechanism eliminates the need for grout or adhesive, providing a hassle-free installation experience. Additionally, the tiles are eco-friendly, being made from recycled materials, aligning with the growing trend towards sustainable living.
Moreover, the wide range of colors and styles available ensures that you can find the perfect match for your home decor, allowing you to create a truly personalized space.
Tools and Materials Needed
Before you begin with your Smartcore tile installation, gather the following tools and materials to ensure a smooth and efficient process:
Utility Knife: For cutting tiles to fit corners, edges, and around obstacles.
Tape Measure: To accurately measure the area to be tiled, ensuring a precise fit.
Carpenter’s Square: To help with aligning the tiles perfectly.
Level: To ensure that the tiles are installed evenly across the floor surface.
Rubber Mallet: Tap tiles into place without damaging them.
Pencil or Chalk Line: To mark measurements and guidelines on the floor for precise tile placement.
Spacers: To maintain consistent gaps between the tiles, ensuring a uniform layout.
Safety Gear: Includes gloves and safety glasses to protect your hands and eyes during the installation process.
Pre-Installation Steps
Checking the Subfloor
Before you start installing your Smartcore tiles, it’s imperative to check the condition of your subfloor thoroughly. This step is crucial for ensuring a successful and durable installation.
The subfloor needs to be clean, dry, and smooth. Remove any dirt, dust, or debris as any remaining particles can interfere with the proper adhesion of the tiles.
Also, be sure to check the level of the subfloor. Any uneven surfaces or dips can cause the tiles to buckle or warp over time. If necessary, apply a self-leveling compound to even out any inconsistencies in the flooring. Lastly, verify the dryness of the subfloor.
Any residual moisture may cause the tiles to loosen or become unstable. Using a moisture meter can help provide an accurate moisture reading. Following these steps will ensure your subfloor is ready for a successful tile installation.
Preparing the Area
Before you begin with the Smartcore tile installation, it’s essential to properly prepare the area. Remove any furniture or items that could obstruct your working space.
This will give you ample room to move around and lay out your tiles. If you are replacing old flooring, make sure to remove it entirely, including any residual adhesive or underlayment. Also, remove any baseboards or trim, as these can affect the proper placement of your tiles.
Use a pry bar with care to avoid any damage. Then, clean the area thoroughly. Sweep or vacuum to get rid of any dust or debris, and mop the floor with a damp cloth (not wet) to ensure a clean surface. Let the floor dry completely before proceeding.
This preparation phase ensures a smoother installation process and contributes to the longevity and effectiveness of your new Smartcore tiles.
Installation Process
1. Laying Out the Tiles
Once your area is well-prepared, you can start laying out the Smartcore tiles. Begin by deciding the direction you want your tiles to be aligned.
Usually, aligning the tiles parallel to the longest wall gives the best aesthetic result. To avoid narrow tile pieces at the wall edges, measure the room’s dimensions and adjust your layout accordingly. Start laying your tiles from the center of the room, moving outward.
This way, any cut tiles will be at the edges of the room, less visible and providing a more professional finish. Remember to leave a gap around the edges for expansion – this can be covered later with baseboards or trim.
Always check for tile alignment as you progress, using a measuring tape or a level. Ensuring the tiles are correctly aligned and evenly spaced will contribute to the overall visual appeal of your floor.
2. Cutting the Tiles
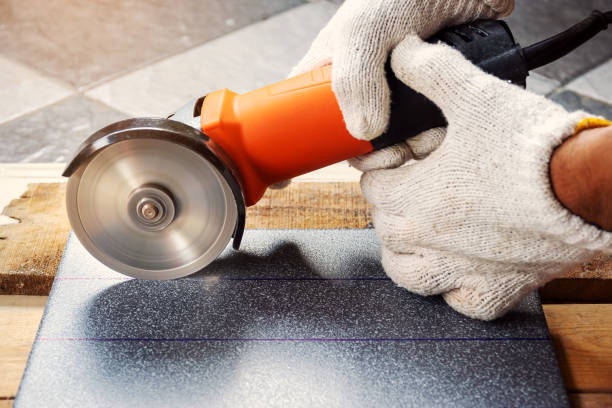
When it comes to cutting your Smartcore tiles, precision is key. If you need to cut a tile, use a straight edge and a utility knife to score the tile where you need it cut. The utility knife should not cut all the way through the tile, just score it.
After scoring the line, you can bend the tile upwards along the score line, and it should snap easily. If a more complex cut is needed, such as around door frames or irregular objects, make a cardboard template of the area, transfer the template onto the tile, and then cut.
Always remember to cut the tiles on a suitable surface to avoid potential damage to the floor underneath. Be sure to handle the utility knife with care to avoid any injury.
Related Topic: How To Cut Smartcore Tile Flooring? (Guide)
3. Applying the Adhesive
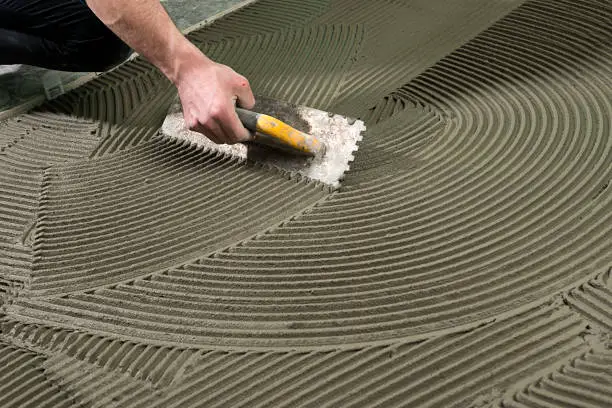
Before laying down your Smartcore tiles, applying an appropriate adhesive is a crucial step. Start with a clean, dry, and even surface. You may use a notched trowel to evenly spread the adhesive across the floor, only covering a small area at a time that matches the size of a few tiles.
Ensure the adhesive is spread consistently, without any gaps or thick patches. The adhesive should then be allowed to become tacky to the touch before laying the tiles. Remember, laying the tiles too soon might cause them to slide while waiting too long might cause the adhesive to dry out.
Always refer to the adhesive manufacturer’s instructions for the optimal wait time. With the right amount of adhesive applied correctly, your Smartcore tiles will adhere strongly, providing a durable and long-lasting finish.
4. Installing the Tiles
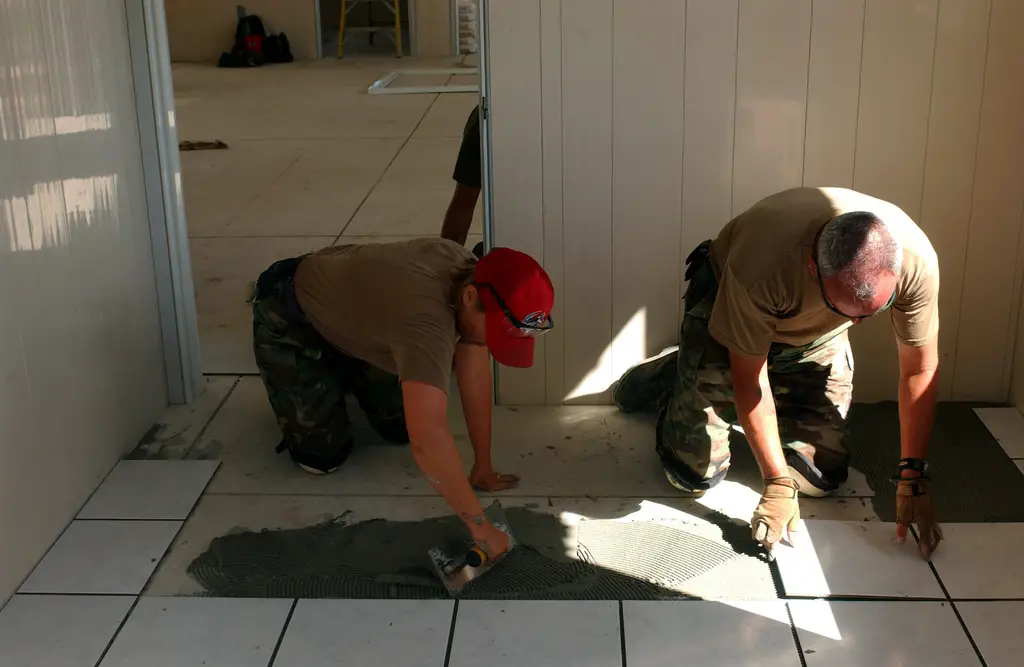
Now that the adhesive has been properly applied, it’s time to lay down the Smartcore tiles. Begin by positioning the first tile in the corner of the room and press it firmly into the adhesive. It’s important to ensure that the tile is laid flat and that there are no air bubbles underneath it.
Continue laying the tiles, one at a time, keeping a close eye on the pattern you are creating. For a professional look, make sure to stagger the junctions between tiles, which not only enhances visual appeal but also adds to the structural stability.
Remember to leave a small gap between the tiles and the wall to allow for expansion. Use tile spacers if necessary to maintain consistent gaps. Once the tiles are positioned, apply pressure or roll over them with a tile roller to ensure a strong bond with the adhesive.
Proceed with the same process until the entire floor is covered with the Smartcore tiles. As you work, always double-check your alignment and adjust as necessary to maintain a straight and symmetrical layout. Following these steps will help you achieve a beautifully installed Smartcore tile floor that is both attractive and durable.
Post-Installation Care
Cleaning and Maintenance Tips
Once your Smartcore tile flooring is installed, it is essential to maintain it properly to retain its shine and longevity. Sweeping or vacuuming regularly helps remove dirt and grit that can scratch the surface of your tiles.
For deeper cleaning, use a damp mop with a mild soap or an approved vinyl floor cleaner; avoid the use of harsh chemicals which can cause damage. It’s also recommended to promptly wipe up any spills to prevent potential staining.
Placing mats at entrances can help capture dirt and moisture from shoes, reducing wear and tear. Furthermore, consider using furniture pads under heavy furniture and appliances to prevent indentations.
Potential Issues and How to Address Them
Even with careful maintenance, you may encounter some issues with your Smartcore tile flooring over time. One common issue is scuff marks or scratches, which can result from dragging heavy furniture or appliances across the floor.
To address this, always lift and move these items rather than dragging them, and consider using protective pads under the feet of heavy items. If your floor does get scratched, there are scratch repair kits available that can help restore its appearance.
Another potential issue is discoloration of the tiles, which can happen due to prolonged exposure to direct sunlight. To mitigate this issue, use blinds, curtains, or other window treatments to shield your flooring from direct sunlight, especially during the intense midday hours.
Lastly, you may face issues with tiles lifting or shifting, especially in high-traffic areas. If this happens, it may be due to an issue with the adhesive or with the subfloor preparation.
In this case, it might be best to seek professional help to rectify the problem. By being aware of these potential issues and knowing how to handle them, you can keep your Smartcore tile flooring looking its best for the longest time possible.
Related Topics:
Conclusion
Smartcore tile flooring is built to withstand the test of time, offering durability and aesthetic appeal. However, like any flooring, it is not impervious to potential issues.
Being proactive in the maintenance of your Smartcore tiles and understanding how to properly address any issues that may arise, such as scratches, discoloration, or shifting tiles, will ensure your floor remains attractive and functional for many years.
Remember, prevention is always better than cure, so take the necessary precautions to protect your investment. Whether you’re dealing with everyday wear and tear or unexpected accidents, your Smartcore tile flooring has the resilience to bounce back and continue serving you well.
1 thought on “Smartcore Tile Installation: A Step-By-Step Guide”