
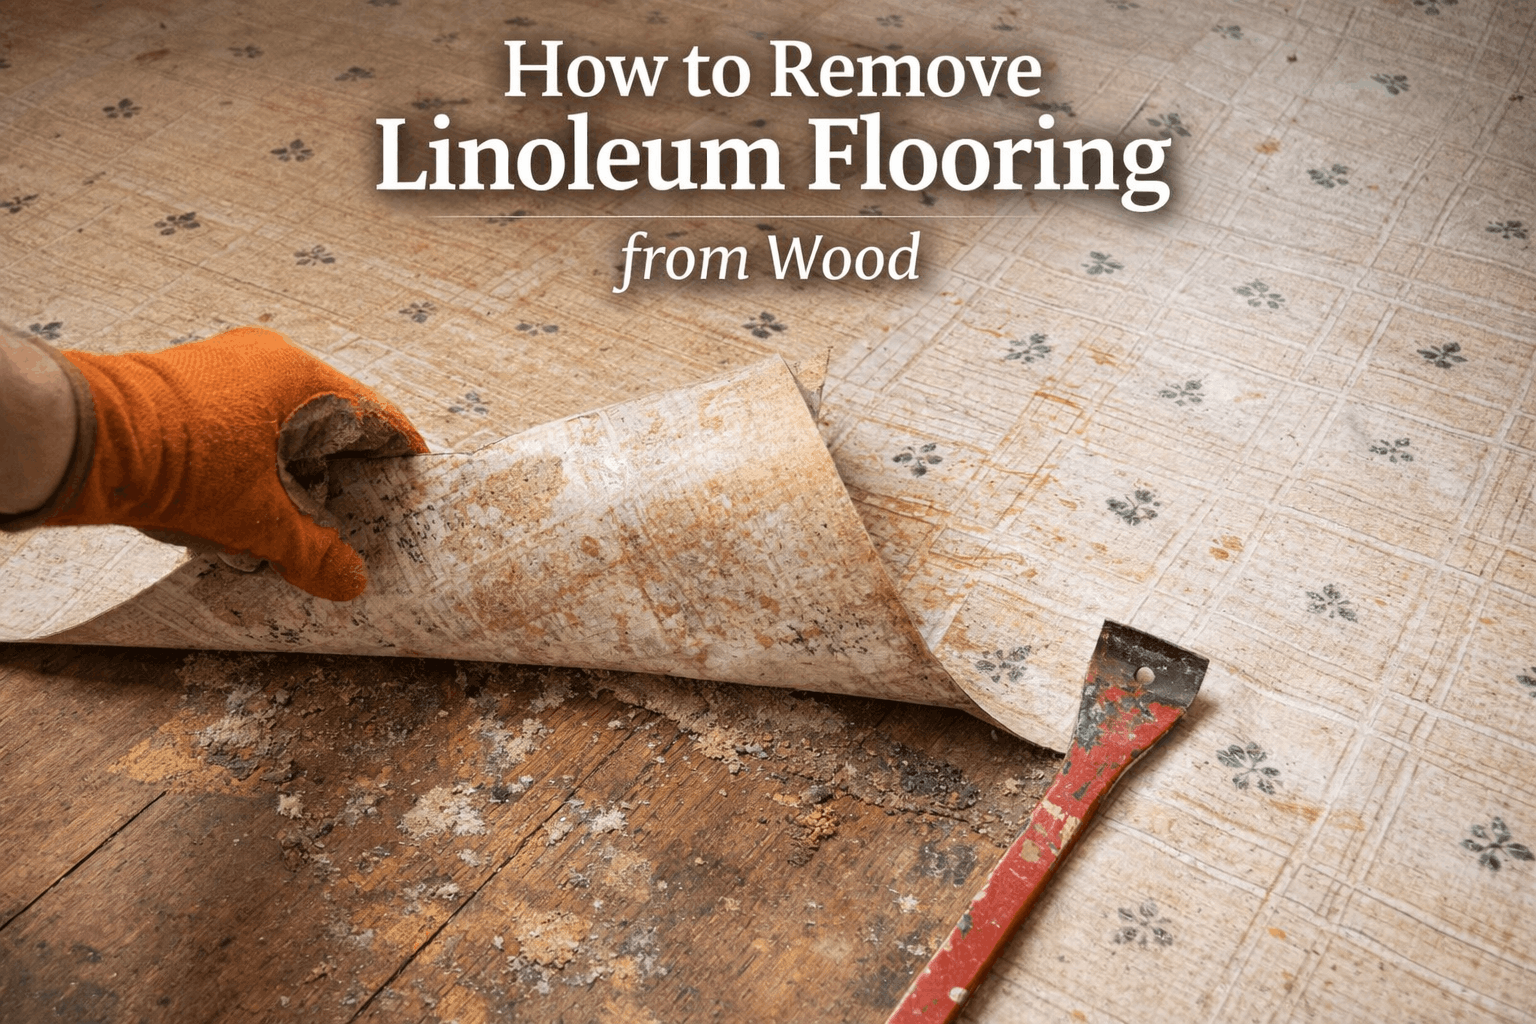
Removing linoleum flooring from a wood subfloor is one of the most common DIY renovation tasks and one of the most frequently done wrong. The flooring itself is usually straightforward to lift. The real challenge is what comes after: a layer of decades-old adhesive that has bonded deeply into the pores of the wood, and a backing paper that tears into frustrating fragments if approached incorrectly.
What makes this task uniquely demanding on wood subfloors compared to concrete is that wood is porous, organic, and vulnerable to moisture and gouging. The techniques that work on concrete can permanently damage a wood subfloor.
This guide covers the right approach from start to finish, with specific attention to protecting the wood beneath.
Step 1: Confirm You Have Linoleum, Not Vinyl
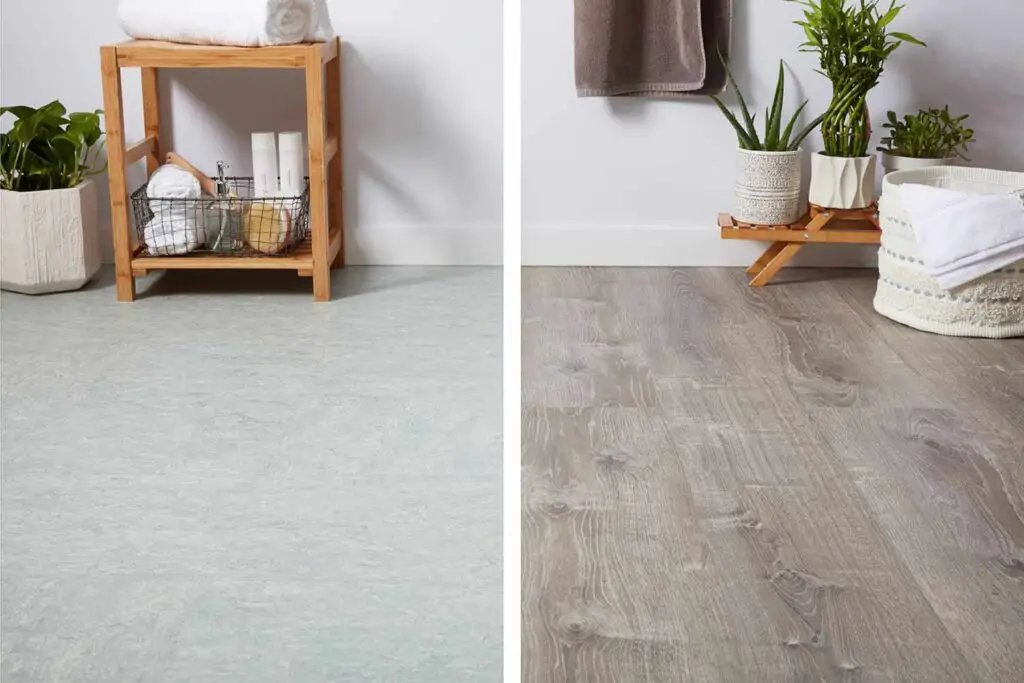
Before doing anything else, confirm that what you are removing is actually linoleum. Linoleum and vinyl are frequently confused even by flooring professionals but they are chemically different materials that behave differently during removal and carry different safety considerations.
- Linoleum: Made from natural materials linseed oil, pine rosin, cork dust, wood flour, and mineral fillers. The pattern runs all the way through the thickness of the material. Cut a small corner and look at the cross-section if the colour continues through the full depth, it is linoleum.
- Vinyl: A synthetic plastic (PVC) product. The pattern is a printed image on the surface only the cross-section will show a clear or white backing beneath a thin decorative layer. Vinyl is typically thinner (under 3mm / 1/8 inch) than linoleum.
This distinction matters because the removal process is similar but the adhesive types differ, and most critically, the asbestos risk is handled differently. If you are unsure, treat the floor as linoleum and follow the safety guidance below before proceeding.
Critical Safety Check: Asbestos Risk in Old Linoleum
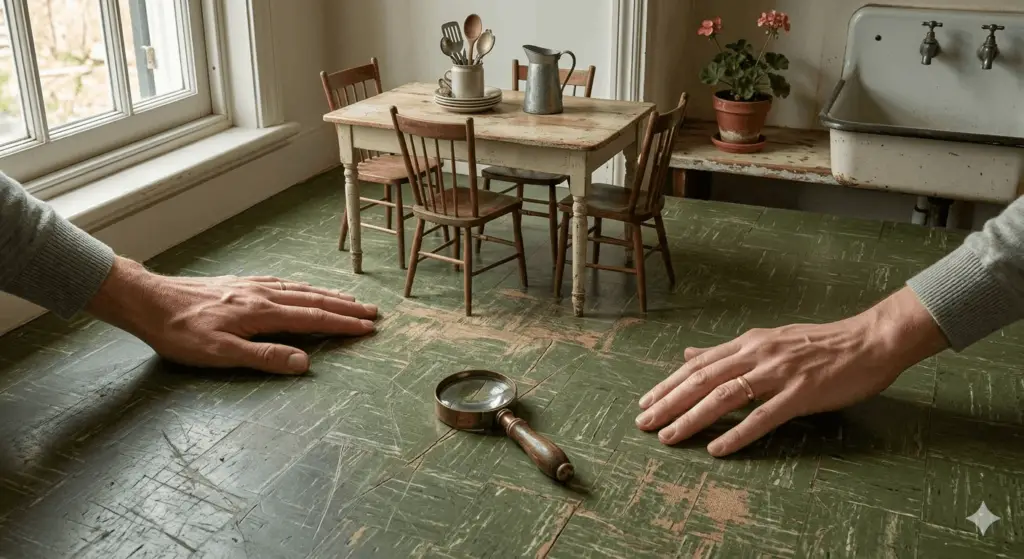
⚠ If your linoleum was installed before 1985, stop and read this section before touching the floor.
Asbestos was widely used in flooring products through the 1970s and into the early 1980s. It was not present in the linoleum sheet itself, but in two places: the black or dark brown asphalt-based adhesive (often called ‘cutback’ adhesive) used to bond linoleum to subfloors, and the felt or paper backing layer applied beneath the linoleum.
Asbestos fibres become dangerous when disturbed cutting, sanding, scraping, or breaking asbestos-containing material releases microscopic fibres that, when inhaled, cause serious and irreversible lung diseases including mesothelioma and asbestosis.
- How to identify potential asbestos adhesive: Look for a thick, black or dark brown tar-like adhesive beneath the linoleum. This ‘cutback’ adhesive is the primary indicator of asbestos risk. Standard modern adhesives are tan, grey, or cream-coloured.
- What to do if you suspect asbestos: Do not cut, scrape, sand, or disturb the flooring or adhesive. Have a certified laboratory test a small carefully-taken sample before proceeding. If asbestos is confirmed, hire a licensed asbestos abatement contractor this is not a DIY task.
- If flooring is post-1985: Risk is very low, but if you see black tar-like adhesive, test regardless of the assumed age of the property. Some older adhesives were used beyond their manufacture dates.
Tools and Materials You Will Need
Having the right tools makes the difference between a manageable project and an exhausting one. Do not substitute cheap, lightweight tools particularly for the scraper. A flimsy putty knife will bend under the pressure needed to lift bonded adhesive from wood.
| Tool | Purpose | Notes |
| Utility knife / Stanley knife | Score linoleum into strips | Replace blades frequently — dull blades tear instead of cut |
| Heavy floor scraper (long-handled) | Lift linoleum and adhesive from subfloor | Blade width 10–15cm (4–6 inch). Heavy gauge only — thin blades bend |
| Heat gun | Soften adhesive for easier removal | Dual-temperature recommended. Keep moving — don’t dwell on one spot |
| Oscillating multi-tool | Cut close to walls and cabinets | More precise than circular saw near fixtures |
| Pry bar / flat bar | Remove baseboards and trim | Use wood block behind bar to protect wall surfaces |
| Citrus-based adhesive remover | Dissolve stubborn adhesive residue on wood | Safer for wood than solvent-based alternatives |
| Shop vacuum | Remove debris and dust | Essential for final subfloor prep |
| Knee pads + work gloves + safety glasses | Personal protection | Non-negotiable — scraper injuries are common |
Step 2: Prepare the Room
Proper preparation prevents damage to walls, trim, and adjacent flooring and makes the physical work significantly easier.
- Remove all furniture: Clear the room completely. Even light furniture creates awkward obstacles when you are working on your knees with a floor scraper.
- Remove baseboards and trim: Linoleum typically runs beneath the baseboards. Insert a pry bar between the baseboard and wall, place a scrap piece of wood behind the bar to protect the wall surface, and apply steady pressure to separate the trim. Mark the back of each piece with its location (e.g., ‘N wall left’) if you plan to reuse them.
- Remove transition strips and door thresholds: These are usually screwed or nailed down. Remove them before cutting the linoleum to avoid damaging them.
- Ventilate the room: Open windows and doors, and set up a fan to exhaust air during the removal process particularly if you will be using a heat gun or adhesive remover solvents.
- Protect adjacent floors: Tape plastic sheeting over adjacent flooring types at the doorway to prevent adhesive remover or debris from staining them.
Related Flooring Topics:
Step 3: Choose Your Removal Method
There are three distinct approaches to removing linoleum from a wood subfloor. The right choice depends on whether the linoleum was bonded directly to the wood subfloor or installed over a separate underlayment layer.
Check before choosing it determines everything.
Method A: Remove Linoleum and Underlayment Together (Most Efficient)
If the linoleum is bonded to a separate thin underlayment (typically 6mm / 1/4 inch plywood or hardboard installed on top of the structural subfloor), the fastest and least damaging approach is to remove both layers together as a single unit.
This avoids hours of adhesive scraping from the structural subfloor entirely. The underlayment was bonded to the structural subfloor with fasteners (screws or staples), not adhesive so it separates cleanly without chemical treatment.
- How to confirm this method applies: Remove a transition strip or floor register to see the floor cross-section. If you can see a thin panel layer beneath the linoleum and above the main structural subfloor, Method A applies.
- Process: Set your circular saw blade depth to no more than 3mm (1/8 inch) deeper than the combined thickness of the linoleum and underlayment. Cut both layers into 30–60 cm (12–24 inch) strips. Use a pry bar to lift each strip from the structural subfloor the staples or screws will pull free with moderate force.
⚠ Do not cut deeper than necessary. Cutting into the structural subfloor weakens it and creates repair work. Measure the combined thickness of linoleum plus underlayment before setting the saw depth.
- Pros: Dramatically faster than scraping adhesive. Less risk of gouging the structural wood. Clean, manageable strips for disposal.
- Cons: Loses the underlayment you will need new underlayment before installing the next floor. Not applicable if linoleum is bonded directly to the structural subfloor.
Method B: Heat and Scrape (Direct Bond to Wood Subfloor)
If the linoleum is bonded directly to the structural wood subfloor with adhesive with no separate underlayment layer you will need to remove it by heating and scraping.
This is more labour-intensive than Method A but the most common scenario in older homes.
The principle is simple: heat softens the adhesive that bonds the linoleum to the wood, making it possible to slide a scraper beneath the linoleum and lift it free.
Without heat, the adhesive grips so tightly that you end up tearing the linoleum into small fragments while leaving most of it stuck to the floor.
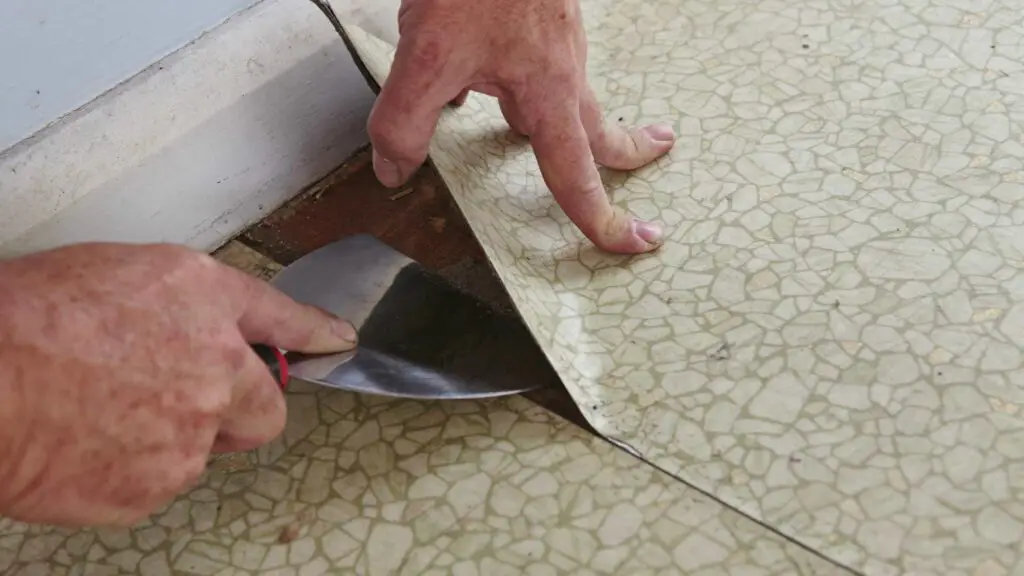
- Step 1 : Score the linoleum: Use a utility knife to cut the linoleum into strips approximately 25–30 cm (10–12 inches) wide. Do not cut wider narrower strips are more manageable and easier to heat evenly. Cut one strip at a time rather than scoring the entire floor at once.
- Step 2 : Apply heat: Hold the heat gun 10–15 cm (4–6 inches) from the linoleum surface and move it slowly over a 30 cm (12 inch) section. The adhesive beneath should soften within 20–30 seconds. Test by pressing a scraper at the edge if it slides under easily, the section is ready.
⚠ On wood subfloors, do not dwell the heat gun on one spot for more than 15–20 seconds. Excessive localised heat can scorch or char the wood beneath the linoleum. Keep the gun moving constantly.
- Step 3 : Scrape at 45 degrees: Insert the floor scraper beneath the linoleum at a 45-degree angle and push forward with short, controlled strokes. The 45-degree angle is critical scraping at a shallow angle (nearly flat) gouges the wood; scraping too steeply lifts only small fragments. Work in the direction of the wood grain where possible.
- Step 4: Work in sections: Reheat before each new section. Adhesive cools and re-hardens quickly. If the scraper stops moving smoothly, stop and reheat rather than forcing it forced scraping gouges wood subfloors.
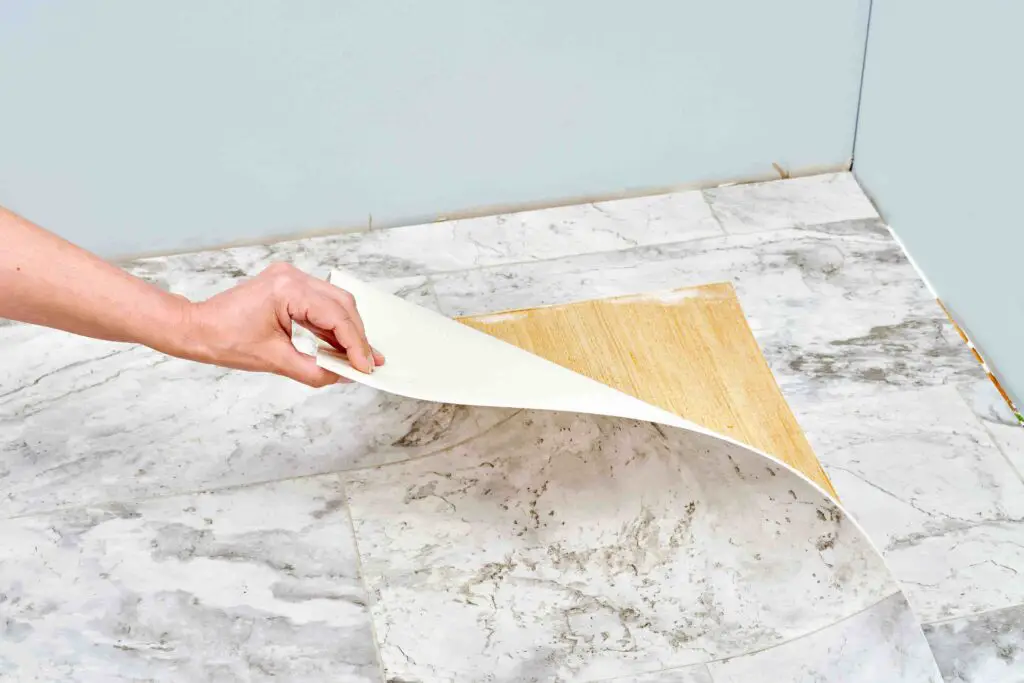
Method C: Dry Scoring and Peeling (Perimeter-Only Adhesive)
Some linoleum installations particularly those from the 1980s and 1990s were adhered only along the perimeter of the room, with the centre floating freely. In this case, a significant portion of the floor can be removed without heat at all.
- How to identify this method: Start by cutting and lifting a piece from the centre of the room. If it lifts with minimal resistance, the centre section is not fully bonded. Only the last 15–30 cm (6–12 inches) near the walls will be glued.
- Process: Cut a strip across the centre of the room. Roll or fold it back. Continue cutting and rolling strips toward the walls. Switch to heat scraping only when you reach the glued perimeter sections.
- Pros: Significantly faster than full heat-and-scrape. Less physical effort. Produces large pieces for easier disposal.
- Cons: Only applicable to perimeter-bonded installations. No way to confirm without testing a centre section first.
Related Flooring Topic:
Step 4: Removing Adhesive Residue from Wood: The Most Critical Phase
Once the linoleum is removed, you will almost certainly be left with adhesive residue and this is where wood subfloor damage most commonly occurs. The adhesive penetrates into the pores of the wood and must be removed before any new flooring can be installed.
But the methods appropriate for concrete (boiling water, aggressive solvents, buffer machines with abrasive screens) will damage or warp a wood subfloor.
There are three adhesive types you may encounter, each requiring a different approach on wood:
Type 1: Modern Water-Based Adhesive (Tan or Cream Coloured)
Water-based adhesives used in installations from the 1990s onwards are the most manageable. They respond well to heat and dry scraping, and citrus-based adhesive removers dissolve them without damaging wood.
- Method: Dry scrape first with the floor scraper at 45 degrees to remove the bulk. For remaining residue, apply a citrus-based adhesive remover (such as Goo Gone or similar citrus formulations) with a cloth. Allow it to penetrate for the time specified on the product label typically 5–10 minutes. Scrape clean, wipe with a damp cloth, and allow to dry completely.
⚠ Apply citrus-based removers sparingly and wipe away promptly. Allowing any liquid to sit on a wood subfloor for extended periods causes swelling and warping. Work in small sections — never apply to the whole floor at once.
Type 2: Cutback / Asphalt-Based Adhesive (Black or Dark Brown)
If you have confirmed through testing that the black adhesive does not contain asbestos, it can be removed but it requires specific chemistry.
Standard adhesive removers are ineffective on asphalt-based cutback adhesive. You need a cutback adhesive remover specifically formulated for this material.
On a wood subfloor, the safest approach is to use a soy-based or citrus-based cutback remover rather than petroleum-based solvents.
Petroleum solvents (mineral spirits, naphtha) penetrate deeply into wood, take a long time to off-gas, and can interfere with the adhesion of new flooring installed afterward.
- Method: Apply the cutback-specific remover in small sections. Allow it to dwell per the manufacturer’s instructions. Scrape at 45 degrees. Wipe clean with absorbent rags. Ventilate the room throughout the process.
⚠ Never use boiling water or a steam method on a wood subfloor with any adhesive type. The combination of heat and moisture causes rapid wood swelling, warping, and potential delamination of plywood subfloors.
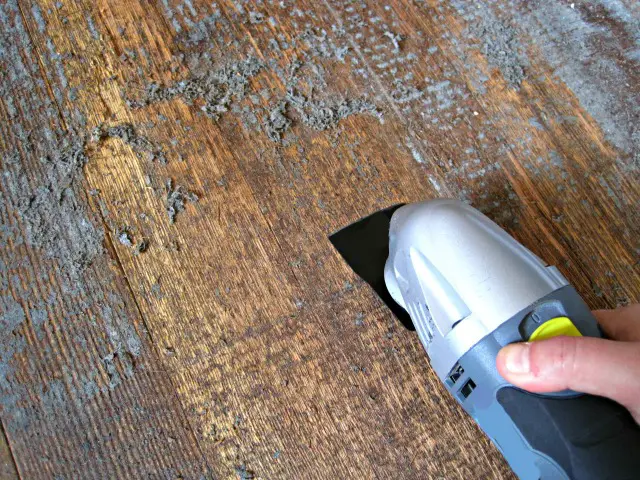
Type 3: Thin Residual Film or Ghosting
Once the bulk of the adhesive is removed, a thin discoloured film often remains in the wood grain. This is typically dissolved adhesive that has penetrated the wood surface and cannot be scraped away.
On a wood subfloor that will be covered by new flooring, this residue does not need to be completely eliminated it needs to be flat and not tacky.
A light sanding with 60-grit sandpaper on an orbital sander removes the surface residue and opens the wood grain for better adhesion of new flooring.
- Important: Sand only after all chemical removers have dried completely at least 24 hours. Sanding wet or chemically-treated wood clogs the sandpaper and produces poor results.
Step 5: Assess and Repair the Wood Subfloor
With the linoleum and adhesive removed, inspect the wood subfloor carefully before proceeding. This step is skipped by most guides and skipping it leads to new flooring that squeaks, bounces, or fails within a few years.
- Check for soft spots: Walk the entire subfloor. Any area that feels soft, bouncy, or spongy indicates rot or water damage to the wood panels. Press a screwdriver into the surface of suspect areas if it penetrates easily, that section needs replacing.
- Check for squeaks: Squeaking subfloor panels indicate insufficient fastening or slight delamination. Re-secure any loose panels with screws (screws hold better than nails in older subfloor repair). Drive screws at 20 cm (8 inch) intervals along the joist lines.
- Check for level: Most new flooring products (laminate, LVP, engineered wood) require the subfloor to be flat within 3mm over 1.8m (1/8 inch over 6 feet). Use a long straight-edge or level to identify dips and humps. Fill low spots with floor levelling compound. Sand down high spots.
- Check for height transitions: If the new flooring will be thinner than the removed linoleum, the subfloor level may change relative to adjacent rooms. Plan for transition strips or height adjustments at doorways before installing new flooring.
When to Replace Rather Than Repair
Minor soft spots and isolated damage can be cut out and replaced with matching plywood panels. However, if more than 20–25% of the subfloor shows signs of rot, water damage, or structural weakness, replacement of the entire subfloor panel in that room is more cost-effective and structurally sound than piecemeal repair.
A damaged subfloor transmits its imperfections to every floor installed above it there is no substitute for a solid, level base.
Related Flooring Topics:
Step 6: Disposal
Linoleum and its adhesive are construction waste and cannot be disposed of through standard household recycling in most areas. Rules vary by location, but these are the standard guidelines:
- Non-asbestos linoleum: Can be bagged in heavy-duty refuse sacks and taken to a licensed construction waste disposal site or tip. Some areas accept it at household waste recycling centres. Call your local facility before arriving some require advance notice for flooring materials.
- Asbestos-containing materials: Must be handled exclusively by a licensed asbestos abatement contractor. They will bag, transport, and dispose of the material according to legal requirements. Under no circumstances should asbestos-containing flooring be bagged in household waste.
- Adhesive-soaked rags and solvents: Chemical-soaked materials are hazardous waste. Take them to a designated hazardous waste collection point do not put them in household bins or pour liquid solvent down drains.
- Large volume disposal: For kitchens, hallways, or larger rooms, hiring a skip or dumpster is the most practical solution. Roll the removed linoleum strips into manageable sections before placing in the skip.
5 Common Mistakes When Removing Linoleum from Wood
- Using water or steam on a wood subfloor: Hot water and steam soften adhesive effectively but they also penetrate wood fibres, causing swelling, warping, and potential delamination of plywood panels. This method works on concrete. It does not work on wood. Heat gun only.
- Scraping at the wrong angle: Too flat (under 30 degrees) and the scraper rides over the adhesive surface without getting beneath it. Too steep (over 60 degrees) and it gouges the wood. The 45-degree angle is the most effective and least damaging for wood subfloors.
- Forcing through stubborn adhesive without reheating: When the adhesive cools and re-hardens, forcing the scraper through it requires excessive pressure and that pressure goes into the wood when the scraper suddenly breaks free. Always reheat before continuing rather than forcing.
- Using petroleum-based solvents on wood: Mineral spirits and acetone penetrate deeply into wood and take weeks to fully off-gas. New adhesive applied over solvent-soaked wood fails to bond properly. Always use citrus-based or soy-based removers on wood subfloors, and allow full drying time before installing new flooring.
- Skipping subfloor inspection: Installing new flooring over a soft, uneven, or inadequately fastened subfloor transfers every flaw to the finished floor. The inspection and repair phase is not optional it is the foundation of a successful flooring installation.
FAQs
How long does it take to remove linoleum from a wood subfloor?
A small bathroom or hallway (under 5 sq m / 50 sq ft) typically takes 2–4 hours for the removal and adhesive cleanup combined. A medium room like a kitchen (10–15 sq m / 100–160 sq ft) takes a full day. Large rooms or those with particularly stubborn adhesive may require two days. The adhesive removal phase almost always takes longer than the linoleum removal itself.
Can I leave the adhesive on the wood subfloor and install new flooring over it?
Only in very specific circumstances. If the adhesive is completely flat, fully cured, not tacky, and covers the surface evenly with no high spots, some floating floor systems (click-lock laminate or LVP) can be installed over it. However, any adhesive residue that creates unevenness, raised ridges, or high spots must be removed or sanded flat imperfections transmit through to the new floor and cause cracking, clicking, or premature wear. When in doubt, remove the adhesive entirely.
What is the best way to remove old linoleum glue from wood?
For modern water-based adhesive, a citrus-based adhesive remover applied sparingly, allowed to dwell briefly, and scraped away at 45 degrees is the safest and most effective method for wood subfloors. For old asphalt-based cutback adhesive (confirmed asbestos-free), a purpose-formulated cutback remover is required. Always apply chemicals in small sections, wipe away promptly, and allow full drying time before sanding or installing new flooring.
Final Thoughts
Removing linoleum from a wood subfloor is a physically demanding but very achievable DIY project when approached methodically.
The most important principles are these: check for asbestos before you start, never use water or steam on a wood subfloor, always scrape at 45 degrees, use citrus-based removers rather than petroleum solvents for adhesive cleanup, and do not skip the subfloor inspection before installing new flooring.
The heat gun is your most important tool it transforms what would otherwise be an exhausting battle with hardened adhesive into a manageable, progressive process.
Work in sections, reheat when the scraper stops moving freely, and give the adhesive remover adequate dwell time before scraping. Follow these principles and your wood subfloor will be clean, flat, and ready for new flooring with no lasting damage.